
Introduction to Preserving Apples
Preserving apples is a fantastic way for young professionals to maximize their culinary adventures while minimizing food waste. Do you ever find yourself with more apples than you know what to do with? Whether you’re juggling a busy career or simply want to create something delicious at home, preserving apples allows you to enjoy their flavor well beyond the harvest season.
One of the most appealing aspects of apple preservation is the versatility it offers. Think about making Homemade Apple Cider Vinegar—not only does this recipe elegantly use leftover apple scraps, but it also results in a healthful product packed with probiotics. According to the USDA, food preservation can extend the life of fresh ingredients by months, making it a smart choice for those who want to enjoy the taste of autumn all year round.
Additionally, embracing preserving techniques can be a cost-effective solution. It reduces grocery bills while nurturing a sustainable lifestyle through smart sourcing practices. So why not indulge your creativity and find joy in the process? You’ll be thrilled to have a jar of homemade apple cider vinegar ready to elevate your meals and drinks. Let’s dive into the art of preserving apples!
For more tips on preserving fruits, check out the National Center for Home Food Preservation.
Ingredients for Homemade Apple Cider Vinegar
Making your own apple cider vinegar is not only a fun project but also a fantastic way to embrace zero waste by utilizing apple scraps! Here's what you'll need:
Essential Ingredients You’ll Need
- Diced apple chunks or apple scraps: Aim for enough to fill half of your fermenting vessel (this could be a quart jar, half-gallon jar, or a 1-gallon crock).
- Sugar: Generally, you’ll need about 1 tablespoon of sugar per cup of water or 1 cup of sugar per gallon of filtered water.
- Filtered water: Make sure it’s lukewarm to help the sugar dissolve better and foster fermentation.
Optional Ingredients for Added Flavor
- Splash of organic apple cider vinegar: Using a bit of finished vinegar can help kickstart your fermentation process.
- Spices: Feel free to throw in some cinnamon sticks or whole cloves for a bit of extra depth in flavor.
For a deep dive into fermentation benefits, check out this article on the health advantages of fermented foods for some fascinating insights! Happy fermenting!
Preparing Homemade Apple Cider Vinegar
Making your own apple cider vinegar is not only a fun project but also a sustainable way to utilize those extra apples lying around. It’s an excellent method for preserving apples and turning scraps into something healthy and delicious. Let’s walk through the steps together!
Gather and Prepare Your Apples
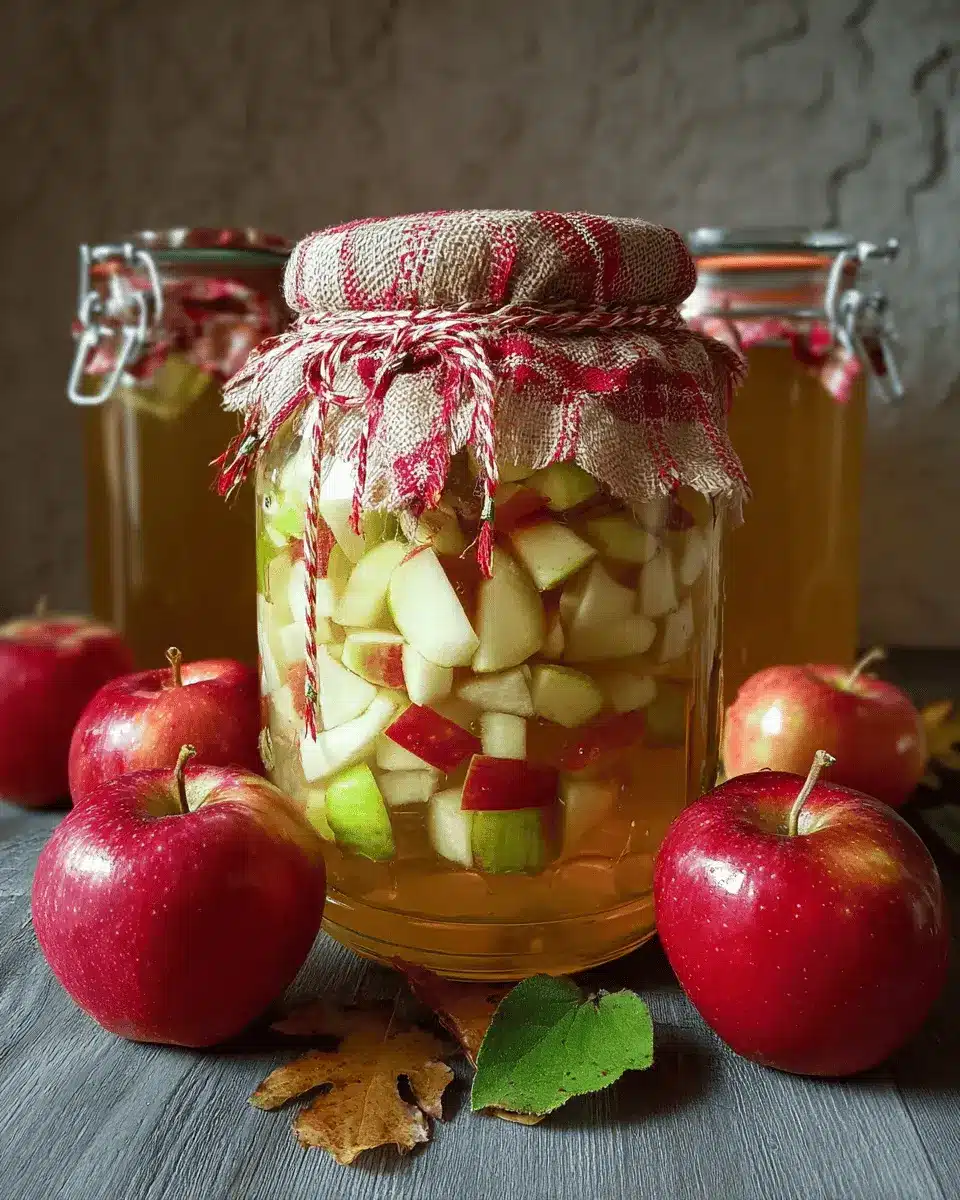
Start by sourcing the apples you wish to use. You can opt for diced apple chunks or even use apple scraps like skins and cores—these are perfect for this recipe! Aim to fill your fermenting vessel (a large glass jar or crock) to about halfway full. Wash your apples well to remove any residual pesticides or wax. If you have a bounty of fallen apples from your garden, consider this a fantastic way to reduce food waste and enjoy a tasty treat later!
Create the Fermenting Mixture
Once your apples are ready, it’s time to create that magical fermenting mixture. Pour lukewarm filtered water over the apple pieces until your vessel is almost full. For every cup of water, stir in 1 tablespoon of sugar to help kickstart fermentation. If you’re working with a larger batch, use 1 cup of sugar per gallon of water. Some enthusiasts even add a splash of store-bought organic apple cider vinegar to boost the fermentation culture—this is optional, but it can be helpful!
Start the Fermentation Process
Cover your fermenting vessel with a breathable material, like cheesecloth or a clean dish towel. It's crucial to keep the mixture well-aerated while also protecting it from dust and bugs. Store it in a dark place at a consistent temperature of about 70–75 degrees F. Stir the mixture daily for about two weeks to prevent mold from forming on the surface. It’s normal to get a bit impatient during this wait, but trust me; good things come to those who wait!
Strain and Store the Vinegar
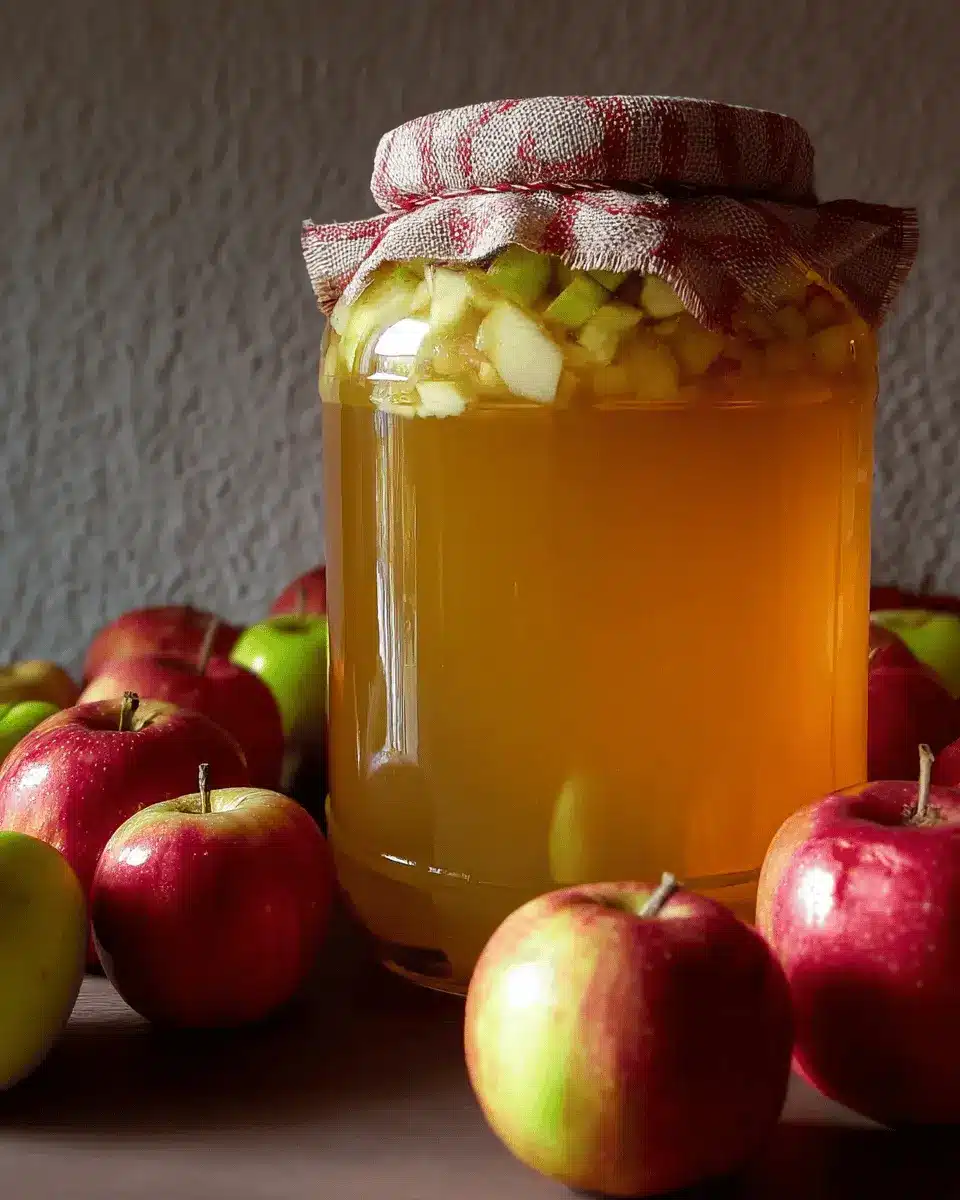
After two weeks of fermentation, it’s time to check on your progress. Strain the liquid into a clean container while composting the remaining apple bits. This reserved liquid is your base apple cider vinegar! Make sure to cover it lightly again with a breathable cloth, keeping it in a low-light area.
Final Fermentation and Storage
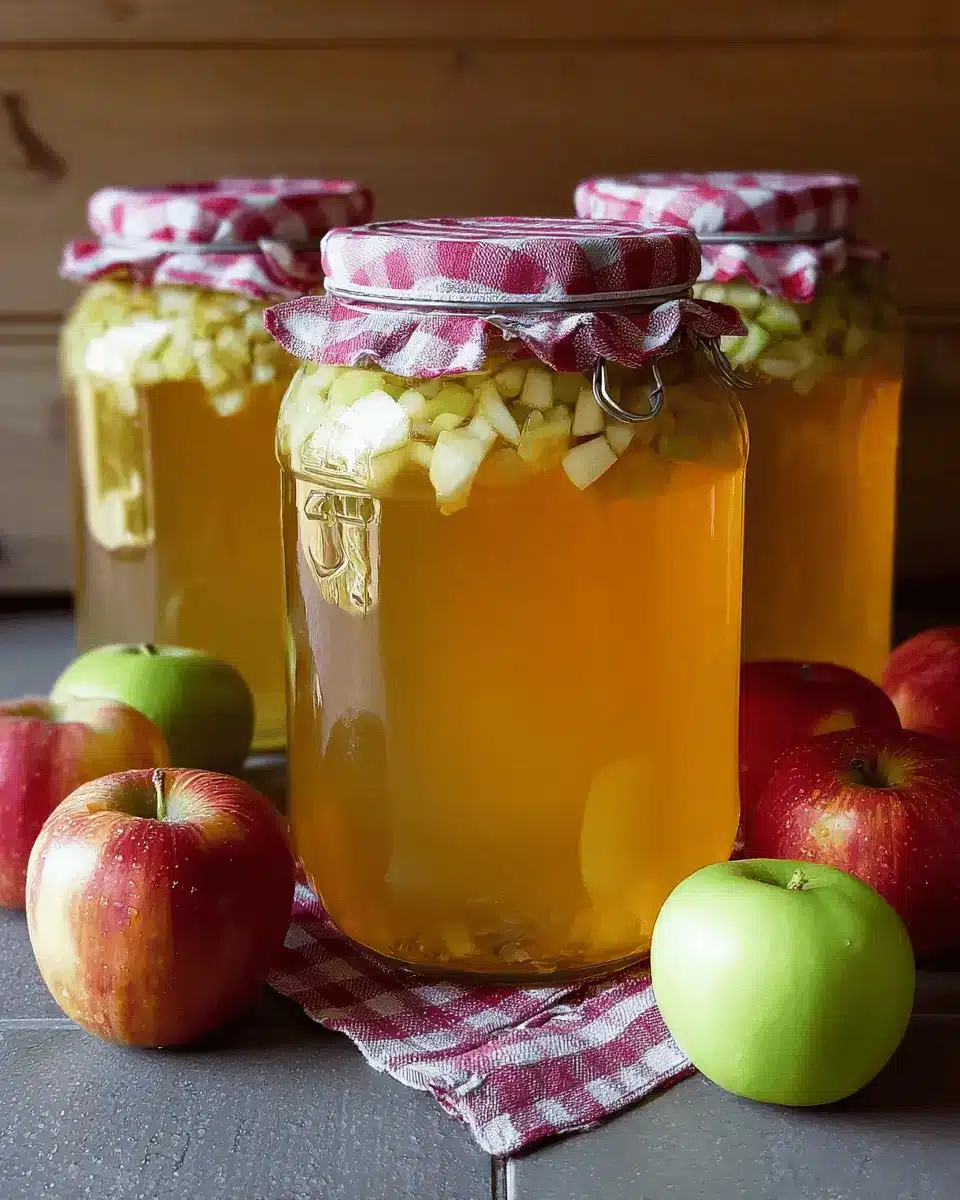
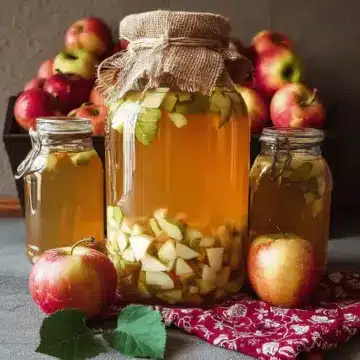
Your vinegar is not quite ready just yet. Leave this liquid to ferment for another one to three months. Around the one-month mark, assess the vinegar’s flavor. Don’t be afraid to taste it! If it’s not tart enough for your liking, let it continue fermenting. Once it reaches your desired flavor, transfer it into bottles with lids or swing-top bottles. Store them in a cool, dark place or your fridge. A well-fermented apple cider vinegar can last over a year, as long as it remains free of mold or strange flavors.
By following these simple steps, you’ll have yourself a robust and flavorful apple cider vinegar. Not only will you enjoy its health benefits, but you can also feel good about your sustainable preserving apples efforts. Enjoy your tangy creation!
Variations on Homemade Apple Cider Vinegar
Adding herbs for unique flavors
Why stick to plain apple cider vinegar when you can elevate it with fresh herbs? Experiment with adding rosemary, thyme, or even basil to your fermenting mixture. These additions not only infuse the vinegar with delightful flavors but also provide extra health benefits. Just toss in a handful of your chosen herbs along with the apple scraps and see how they transform your homemade vinegar into something truly gourmet.
Using different types of apples for vinegar
Did you know the variety of apples you use can dramatically impact the flavor of your vinegar? For a sweeter profile, consider using Honeycrisp or Fuji apples, while Granny Smith will give you a tangy kick. Mixing different types can create a complex taste that’s uniquely yours. As you explore, think about preserving apples not just for their use but for the fascinating flavor journey they offer in your homemade cider vinegar. For more on apple varieties, check out this guide.
Cooking Tips and Notes for Homemade Apple Cider Vinegar
Common Mistakes to Avoid During the Fermentation Process
When making your own apple cider vinegar, patience is key! One common mistake is rushing the fermentation. Ensure that you allow the mixture to sit undisturbed for the suggested time; this brings out the best flavors. Also, avoid introducing any metal tools or containers, as they can disrupt the fermentation process. Always stir daily to prevent mold buildup, which can spoil your vinegar.
Importance of Clean Materials for Fermentation
Using clean materials is crucial to successful fermentation. Make sure all your containers, jars, and utensils are thoroughly washed and sanitized to avoid unwanted bacteria. Remember, cleanliness directly impacts the health of your culture! I often run my tools through the dishwasher or soak them in a vinegar solution to guarantee a fresh start. For more detailed info on maintaining kitchen hygiene, check out resources from the USDA.
By keeping these tips in mind, you'll be well on your way to mastering the art of preserving apples through delightful homemade apple cider vinegar!
Serving Suggestions for Homemade Apple Cider Vinegar
How to Incorporate Vinegar into Your Meals
Homemade apple cider vinegar can elevate your dishes in delightful ways. Consider drizzling it over fresh salads for a zesty dressing, mixing it into marinades for grilled chicken or turkey bacon, or even adding a splash to your morning smoothie for a tangy kick. You’ll find that just a tablespoon can enhance the flavors while providing health benefits.
Creative Uses for Apple Cider Vinegar Beyond Cooking
The versatility of apple cider vinegar extends far beyond the kitchen! Use it as a natural cleaning agent for countertops and glass surfaces, or mix it with water for a refreshing facial toner. Need a boost of energy? Dilute it in water for a quick, revitalizing drink. If you’re curious about the potential benefits of vinegar, check out sources like Healthline for more insights. Your homemade apple cider vinegar can truly be a game-changer in both culinary and non-culinary aspects of your life!
Time Breakdown for Homemade Apple Cider Vinegar
Preparation Time
The initial prep for your homemade apple cider vinegar takes about 20 minutes. This includes gathering your apples, chopping them up, and mixing everything together. It’s a quick and satisfying task that sets the stage for your delicious creation.
Fermentation Time
Once your mixture is prepared, it’s time for the magic to happen! Fermentation takes approximately 60 days, during which beneficial bacteria work their charm, transforming sugars into rich, tangy vinegar. This wait is well worth the end result!
Total Time Until Ready
In total, you're looking at about 60 days and 20 minutes from prep to a flavorful apple cider vinegar. So, while it may require some patience, remember: good things take time—especially when preserving apples into something as delightful as homemade vinegar.
For more tips on fermentation and preservation, check out Healthline’s guide!
Nutritional facts for Homemade Apple Cider Vinegar
Health benefits of apple cider vinegar
Homemade apple cider vinegar is not just a tasty addition to your recipes; it comes with numerous health benefits. This tangy elixir may help regulate blood sugar levels, aid digestion, and support weight management. Additionally, many people use it for its potential antimicrobial properties, making it a versatile ingredient in natural wellness routines.
Nutritional components to consider
When preserving apples in vinegar form, you'll find that it retains essential nutrients. Key components include:
- Acetic Acid: Known for its antioxidant and antimicrobial properties.
- Vitamins: Contains small amounts of vitamins like B and C that contribute to overall health.
- Minerals: Provides trace minerals such as potassium that support heart health and muscle function.
For an in-depth understanding of the nutritional landscape of apple cider vinegar, check out Healthline’s benefits of apple cider vinegar. Making your own offers a personal touch and ensures you know exactly what goes into your cider!
FAQs about Preserving Apples
Can I use store-bought apple scraps to make vinegar?
Absolutely! Using store-bought apple scraps can be a fantastic way to make your homemade apple cider vinegar. Just ensure the apples are organic and wash them thoroughly to remove any chemicals or pesticides. Skins and cores left over from your apple-centric recipes work beautifully!
How long will homemade apple cider vinegar last?
When properly stored, your homemade apple cider vinegar can last for over a year. Keep it in a cool, dark place or the refrigerator to maximize its shelf life. Always check for any signs of mold or unusual smells before using.
Is it safe to consume homemade apple cider vinegar?
Yes, it's generally safe! Just make sure your vinegar is properly fermented, and avoid any that shows signs of spoilage. Homemade apple cider vinegar is not only safe but packed with health benefits thanks to its probiotics. For more insights, consider checking out resources like the USDA’s Food Safety guidelines.
These tips should help you enjoy and preserve your apples in a way that’s both healthy and sustainable!
Conclusion on Preserving Apples
Embracing homemade apple products not only enhances your culinary creations, but it also supports a healthier lifestyle. By preserving apples through methods like making cider and vinegar, you minimize waste and ensure a nutritious, flavorful addition to your meals. Dive into the joys of home preservation and enjoy the countless benefits!
Embracing Homemade Apple Products for a Healthier Lifestyle
Creating your own apple products, such as homemade apple cider vinegar, empowers you to take control of your diet. You'll know exactly what's in your food and can avoid additives and preservatives often found in store-bought options. Moreover, utilizing unused apple scraps fosters a sustainable lifestyle.
If you’re eager to explore more sustainability tips and health benefits of homemade products, check out sources like The USDA for preserving related guidelines or Harvard Health for insights on fermented foods and gut health. Remember, each small change can lead to a healthier you and a happier planet!
Homemade Apple Cider Vinegar
Equipment
- Quart jar
- Half-gallon jar
- 1 gallon crock
Ingredients
Apple Ingredients
- 1 half of vessel Diced apple chunks or apple scraps Fill half of your chosen fermenting vessel
- 1 tablespoon Sugar Per cup of filtered water
- 1 cup Sugar Per gallon of filtered water
- 1 gallon Filtered water Use lukewarm water
Instructions
Preparation Instructions
- Wash and chop the apples into chunks, or gather collected apple scraps and add them to your jar until half full.
- Pour lukewarm filtered water over the apples until almost full, measuring the total amount of water added.
- Stir in sugar at the ratio of 1 tablespoon of sugar per cup of water, or for larger batches, 1 cup of sugar per gallon.
- Optionally add a splash of finished organic apple cider vinegar to inoculate the culture.
- Stir until thoroughly mixed, then cover with breathable material.
- Store in a dark location at 70 to 75 degrees F for two weeks to ferment, stirring every day.
- After two weeks, strain and reserve the liquid into a similar container, compost the spent fruit.
- Move the covered container to a cool place for long-term fermentation, maintaining darkness.
- After one month, sample the vinegar to check if it's to your liking; allow it to ferment longer if needed.
- Once fermented to your desired flavor, transfer the vinegar into bottles with lids and store.


Leave a Reply