
Introduction to Chocolate Covered Cherry Brownie Bombs
If you're in search of a decadent treat that combines the rich flavors of chocolate and cherries, look no further than Chocolate Covered Cherry Brownie Bombs. These delightful bites feature a fudgy brownie exterior wrapped around sweet cherries, all enveloped in a glossy layer of chocolate. What’s not to love?
Why Chocolate Covered Cherry Brownie Bombs Are a Must-Try
These brownie bombs are not just any dessert; they’re a conversation starter and a delight for your taste buds. Imagine biting into a soft brownie only to discover a juicy cherry bursting with flavor inside. It's the perfect balance of textures, and the chocolate coating adds an irresistible finish that will have everyone reaching for more.
Whether you’re hosting a party, attending a potluck, or just looking for a sweet escape during your busy week, these Chocolate Covered Cherry Brownie Bombs will impress. Plus, they're surprisingly easy to make! You only need a few ingredients, such as brownie mix and frosted cherries, to whip these up. Looking for tips on perfecting your brownie game? Check out this essential guide to brownies for expert advice.
So grab your apron, and let’s dive into this delicious recipe that is sure to become a favorite in your dessert rotation!
Ingredients for Chocolate Covered Cherry Brownie Bombs
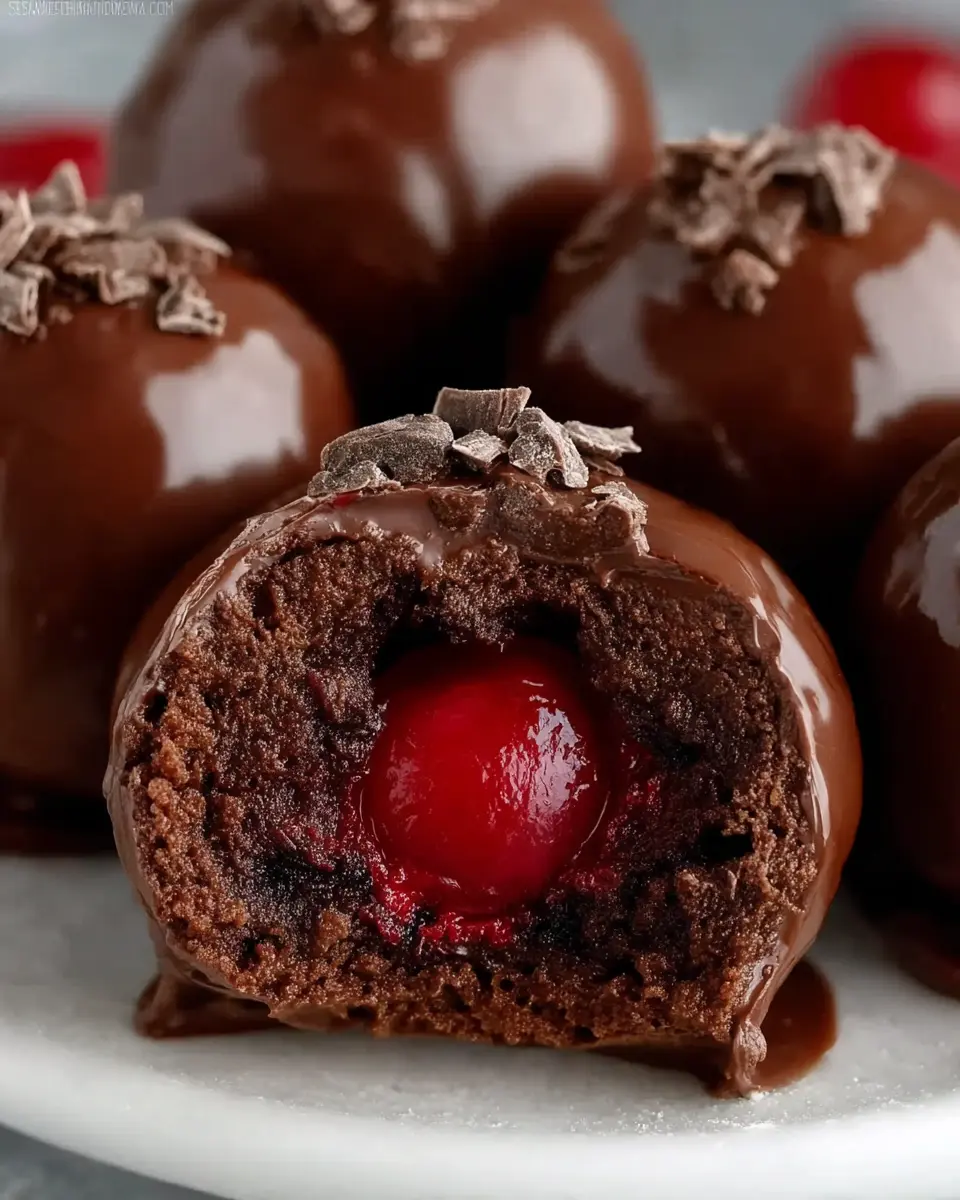
Essential ingredients for brownie bombs
Creating your delicious Chocolate Covered Cherry Brownie Bombs is super simple, thanks to a handful of essential ingredients. Here’s what you’ll need:
- Brownie Mix: Start with a box of your favorite brownie mix along with its required ingredients (water, oil, and eggs).
- Chocolate Frosting: A ¾ cup of chocolate frosting adds that delectable creamy texture that binds the brownie mixture.
- Cherry Filling: You can opt for either a 15 oz can of cherry pie filling or maraschino cherries, depending on your preference (note that maraschino cherries are easier to handle).
- Almond Bark: For that iconic chocolate shell, have 15 oz of almond bark ready to melt.
Optional ingredients and substitutions
If you're feeling adventurous or need to make some substitutions, here are a couple of options:
- Nut Butters: Feel free to mix in a tablespoon of your favorite nut butter for an added layer of flavor.
- Flavor Extracts: Consider adding a splash of almond or vanilla extract to enhance the overall taste of your brownie bombs.
- Alternative Toppings: Want a crunch? Try coating the dipped brownie bombs with crushed nuts or sprinkles before the chocolate sets for a fun texture.
These Chocolate Covered Cherry Brownie Bombs are full of flavor and joy, making them perfect for any occasion!
Step-by-Step Preparation of Chocolate Covered Cherry Brownie Bombs
Creating irresistible Chocolate Covered Cherry Brownie Bombs is a straightforward process that yields delicious results. Follow these easy steps for a sweet treat that’s sure to impress your friends and family!
Baking the Brownies
Start by preparing the brownies according to the instructions on your box mix. Make sure to bake them at the specified temperature and time, but keep an eye on them to avoid overcooking. Trust me, nobody wants crunchy brownie bits in their bombs! Once they’re baked to perfection, let them cool completely on a wire rack. This cooling step is crucial as it ensures the brownies hold together when you form them into balls later.
Crumbling and Mixing with Frosting
Once your brownies are cool, it’s time to crumble them! You can do this manually by breaking up the brownies in a large mixing bowl until they resemble coarse crumbs. Next, add about ¾ cup of chocolate frosting to the crumbled brownies. This will be the magic ingredient that binds everything together! If you need to adjust the consistency, add a bit more frosting until the mixture easily holds together but isn’t too sticky. For a smooth and delicious frosting recipe, check out this chocolate buttercream frosting recipe!
Shaping the Brownie Bombs
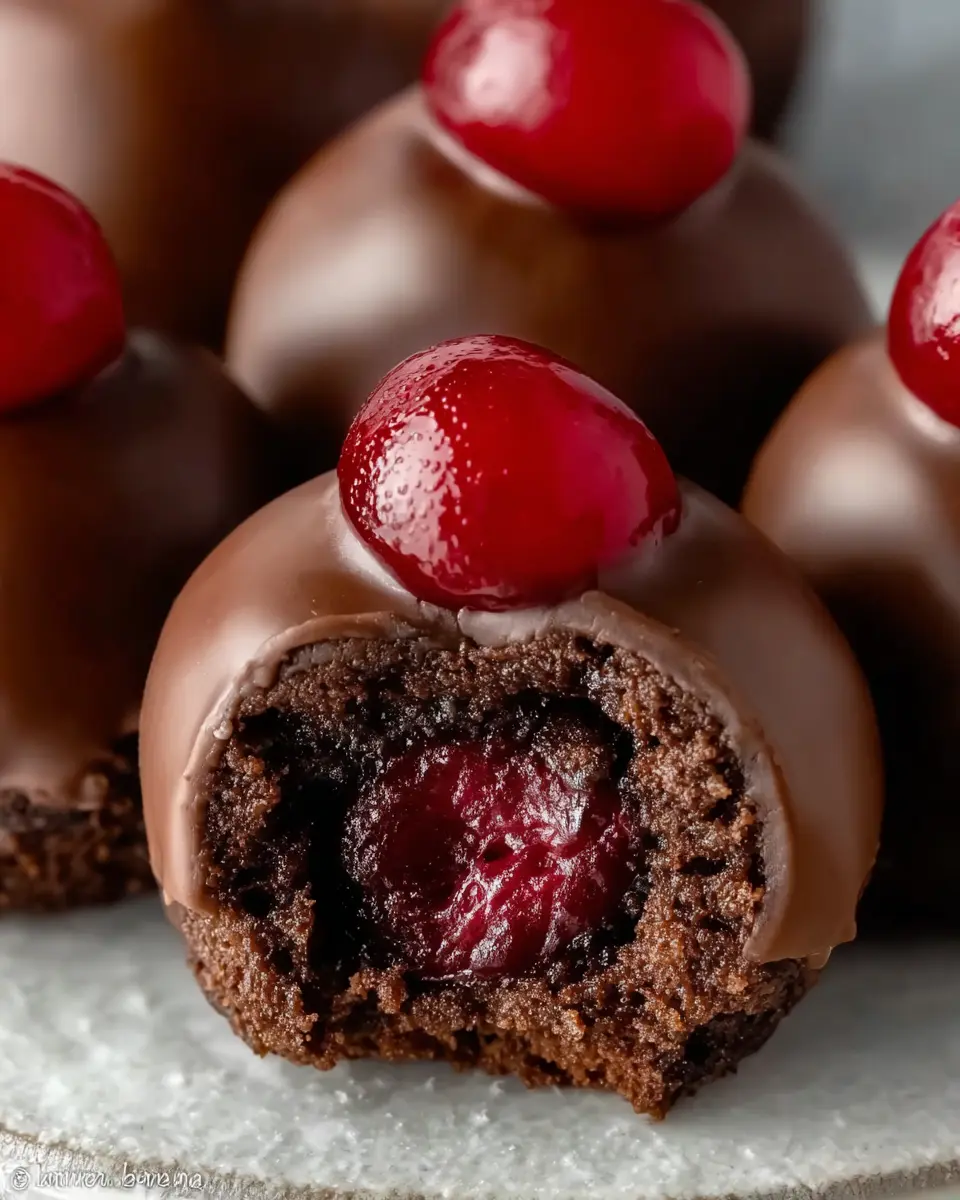
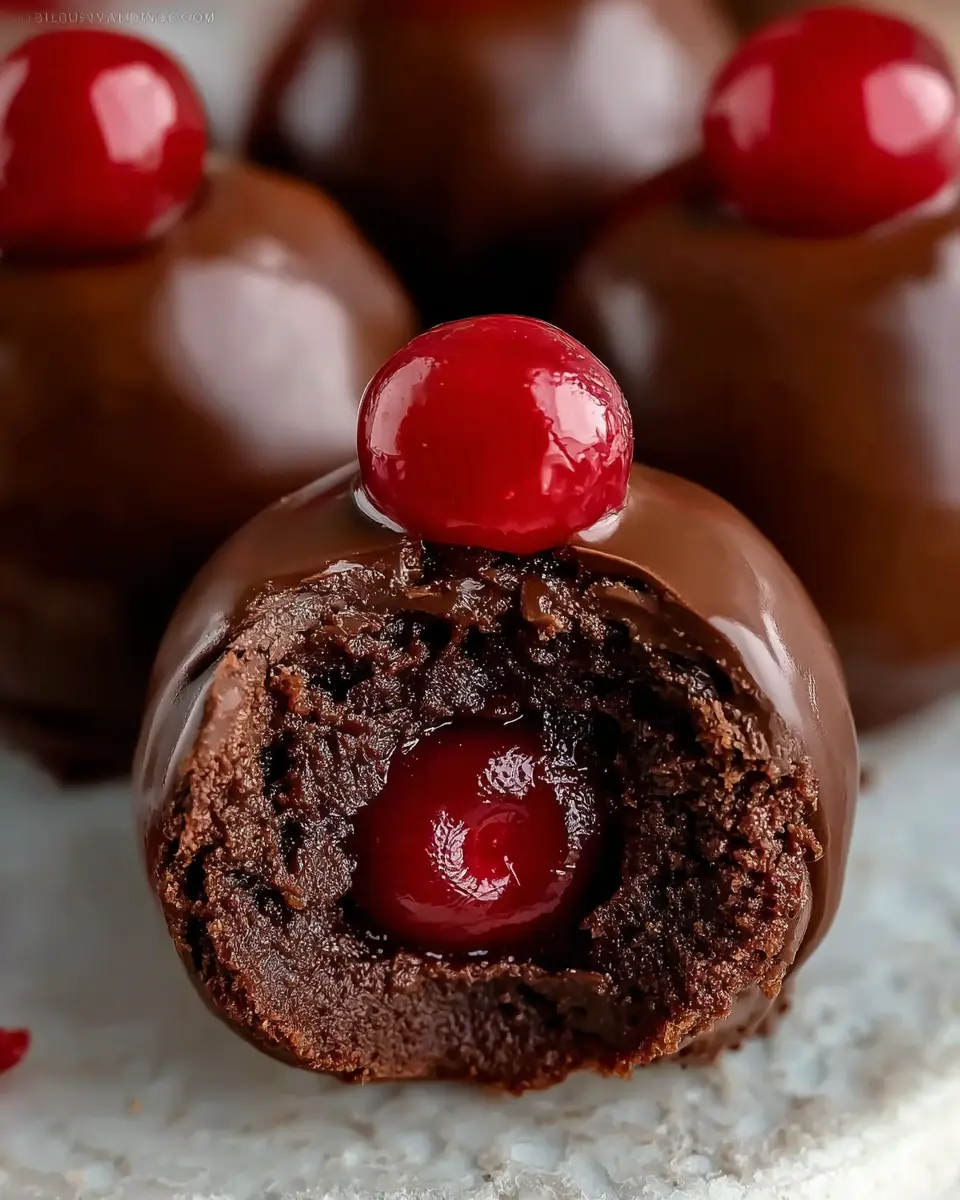
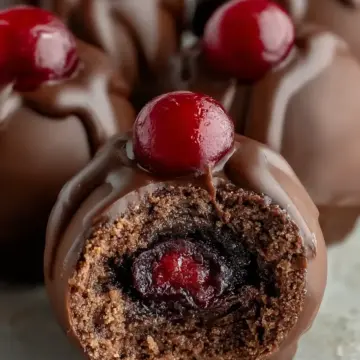
Now comes the fun part—forming the brownie bombs! Scoop about 1 and ½ tablespoons of the brownie mixture and flatten it slightly in your palm. Create a small cavity in the center and place a cherry (from your cherry pie filling or maraschino cherries) inside. Carefully fold the brownie mixture over the cherry, ensuring it's fully enclosed. This prevents any leakage during the chocolate coating! If you want to ensure a good seal, you can top off the ball with a bit more brownie mixture.
Freezing the Brownie Bombs
Once you have shaped all your brownie bombs, it’s vital to freeze them for about 20 minutes. This step helps them firm up, making them easier to coat in chocolate later. While they chill, you can prep your chocolate coating.
Coating with Chocolate
After freezing, melt your almond bark according to the package instructions. You can use a microwave or a double boiler, but make sure it’s smooth and flowing. Working with one brownie bomb at a time, dip it into the melted chocolate, ensuring it’s completely covered. Gently tap off any excess chocolate before placing it on wax paper to cool. Repeat this process until all your Chocolate Covered Cherry Brownie Bombs are coated. Allow them to dry completely, and you’re ready to indulge!
These delightful bites are perfect for any occasion or just a sweet treat for yourself. Enjoy the delicious harmony of brownie, cherry, and chocolate with every bite!
Variations on Chocolate Covered Cherry Brownie Bombs
Options for Different Fillings
While cherries bring a classic flavor, consider experimenting with alternative fillings for your Chocolate Covered Cherry Brownie Bombs. Try using fresh raspberries for a tart twist, or creamy peanut butter for a rich, savory experience. For a more indulgent treat, why not fill them with a dollop of chocolate ganache? The possibilities are endless!
Creative Toppings and Coatings
The fun doesn’t stop at just chocolate coating! You can elevate your brownie bombs by rolling them in crushed nuts, sprinkles, or even coconut flakes. For a touch of elegance, drizzle white chocolate over the top or dust them with cocoa powder. Feeling adventurous? Try pairing with different flavored chocolate coatings, like caramel or mint chocolate, to create your signature Chocolate Covered Cherry Brownie Bombs. The only limit is your imagination!
Cooking Tips and Notes for Chocolate Covered Cherry Brownie Bombs
Avoiding Common Mistakes
When whipping up your Chocolate Covered Cherry Brownie Bombs, be sure to watch your brownie baking time. Overcooked brownies lead to dry bombs that just won’t impress! Also, ensure you’re thoroughly cooling your brownies before crumbling them—hot brownies can yield a sticky mess. If using maraschino cherries, note that they may leak, so be gentle when sealing them inside your bites.
Tips for Achieving the Perfect Consistency
For that perfect bomb texture, aim for a mixture that sticks together without being overly gooey. Start by mixing in less frosting and gradually add more until you get that ideal dough-like consistency. If you’ve ever made cake pops, you’re on the right track! Using a cookie scoop not only simplifies portioning but also helps maintain uniformity in size, leading to a delightful presentation.
For more brownie tips, check out this guide on achieving brownie perfection. Happy baking!
Serving Suggestions for Chocolate Covered Cherry Brownie Bombs
Pairing Suggestions
Looking for the perfect pairings for your Chocolate Covered Cherry Brownie Bombs? Try serving them alongside a scoop of vanilla ice cream or a dollop of whipped cream for a delightful contrast in flavors. A cup of freshly brewed coffee or a rich hot chocolate can also enhance the chocolatey experience, making every bite a treat for your senses.
Presentation Ideas
When it comes to serving, presentation is key! Arrange the brownie bombs on a decorative plate or in a tiered stand for a stunning centerpiece. Consider adding a sprinkle of shaved chocolate or crushed cherries on top for an extra pop of color and texture. For added flair, you might even package them in simple, clear bags tied with a ribbon for a delightful homemade gift idea. Your friends and family will be impressed!
Ready to take your Chocolate Covered Cherry Brownie Bombs to the next level? Enjoy these simple serving suggestions; they're sure to elevate your dessert experience!
Time Breakdown for Chocolate Covered Cherry Brownie Bombs
Preparation time
Making the Chocolate Covered Cherry Brownie Bombs takes about 30 minutes. This includes baking the brownies, cooling, and mixing them with frosting. It's a great way to spend some time in the kitchen, especially if you enjoy creating delectable treats.
Freezing time
You’ll want to allow 20 minutes for freezing the brownie balls before dipping them in chocolate. This step ensures they hold their shape when coated and makes it easier to work with.
Total time
In total, set aside approximately 50 minutes for this delightful dessert, not including any optional chilling time before serving. Enjoy the process, and relish the anticipation of biting into these irresistible brownie bombs!
These Chocolate Covered Cherry Brownie Bombs make for an ideal treat for parties or a cozy night in. Are you ready to dive into this chocolatey adventure?
Nutritional Facts for Chocolate Covered Cherry Brownie Bombs
Calories per serving
Each serving of Chocolate Covered Cherry Brownie Bombs contains approximately 150 calories. This makes them a delightful treat without completely derailing your nutrition goals!
Sugar and fat content
These brownie bombs boast around 12 grams of sugar and 7 grams of fat per serving. While they are indulgent, they can certainly fit into an occasional sweet treat in moderation.
Dietary information
Chocolate Covered Cherry Brownie Bombs are vegetarian-friendly, but they contain gluten and dairy due to the brownie mix and frosting. For a personalized twist, consider swapping in gluten-free brownie mixes! If you want to explore more about dietary accommodations, check out the Academy of Nutrition and Dietetics for insights on balanced eating.
Enjoy making these delightful sweets while keeping their nutritional profile in mind!
FAQs about Chocolate Covered Cherry Brownie Bombs
Can I make these without a boxed brownie mix?
Absolutely! If you're feeling adventurous, you can create a homemade brownie batter from scratch. Just use your favorite brownie recipe that yields a fudgy texture. This can give your Chocolate Covered Cherry Brownie Bombs a personal touch and custom flavor profile. Check out this fantastic brownie recipe for inspiration!
How should I store brownie bombs?
To keep your Chocolate Covered Cherry Brownie Bombs fresh, store them in an airtight container in the refrigerator. This will help maintain their texture and flavor. They should last for about a week—if they last that long!
Can I freeze them for later?
Yes, you can freeze your brownie bombs! Flash freeze them for about an hour on a baking sheet, then transfer them to an airtight container with parchment paper in between layers. They can be stored for up to a couple of months, making them a perfect treat to have on hand for unexpected guests or cravings!
Conclusion on Chocolate Covered Cherry Brownie Bombs
In summary, Chocolate Covered Cherry Brownie Bombs are the perfect dessert for any occasion, combining rich brownie flavors with the tartness of cherries. They’re fun to make and even more enjoyable to share! Treat yourself and your loved ones to these delightful bites — you won’t regret it!
Chocolate Covered Cherry Brownie Bombs
Equipment
- oven
- mixing bowl
- cookie scoop
- wax paper
Ingredients
Brownie Bomb Ingredients
- 1 box brownie mix plus necessary ingredients to make the brownies
- ¾ cup chocolate frosting
- 15 oz almond bark melted according to package instructions
- 1 can cherry pie filling or maraschino cherries see note
Instructions
Preparation Steps
- Bake the brownies as directed and let cool completely. Do not overcook the brownies, crunchy brownie bits don’t make for good bombs.
- Crumble the made brownies and mix in about ¾ a cup of chocolate frosting. You want a consistency that stays together easily but isn’t too sticky to roll into balls.
- Start with about 1 ½ tablespoon of brownie frosting mixture to form it into a ball, then make a hole to drop in one cherry.
- Fold the brownie ball in over the cherry or seal it with a little more brownie/frosting mixture.
- Once you have all your bombs made, pop them in the freezer for about 20 minutes.
- Melt the almond bark while the bombs are hardening up in the freezer.
- After 20 minutes, remove them from the freezer, drop each bomb into the melted almond bark, then tap off the excess chocolate.
- Place each bomb on wax paper and wait for it to dry completely.


Leave a Reply