
Introduction to Gluten Free Thumbprint Cookies
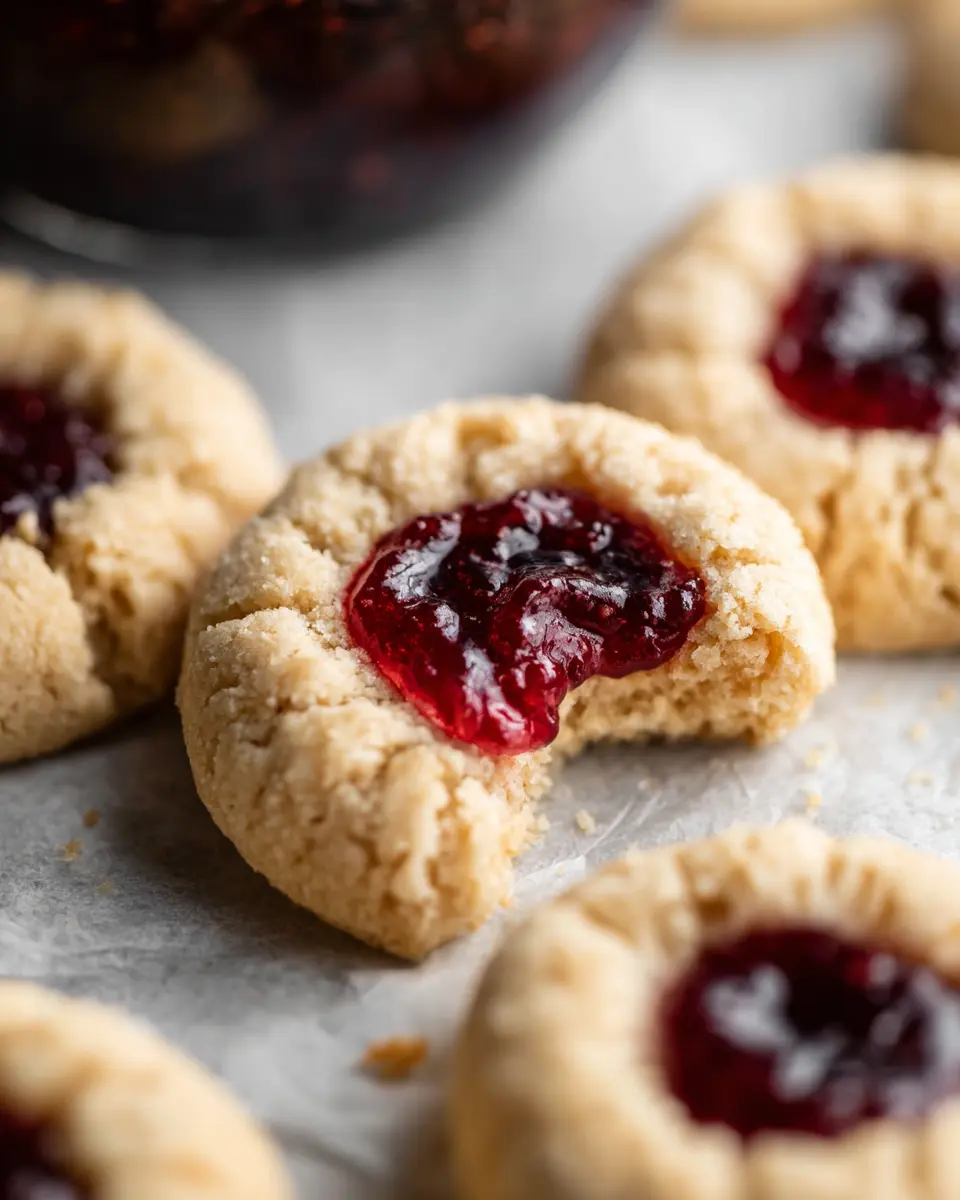
If you’re looking for a delightful treat that checks all the boxes for taste, ease, and dietary needs, look no further than gluten free thumbprint cookies. These cookies are not only buttery and soft but also perfect for filling with your favorite jam—think raspberry, strawberry, or even lemon curd! The beauty of thumbprint cookies lies in their simplicity; made with pantry staples, they are an ideal addition to any cookie platter or gathering.
Why Gluten Free Thumbprint Cookies Are a Must-Try
-
Inclusive Baking: Whether you or a friend is navigating gluten sensitivity, these cookies ensure everyone can enjoy a sweet treat together. Studies show that 1 in 100 people has celiac disease, making gluten-free options essential in social settings.
-
Flavorful Fillings: The jam-filled center brings a pop of flavor that contrasts beautifully with the buttery cookie base. It's a delightful surprise in every bite!
-
Easy to Make: With just a short prep and bake time, you won’t spend all day in the kitchen. The hands-on process of pressing your thumb into the dough can even be a fun activity with friends or family.
-
Customizable Options: From using different jams to experimenting with spices, these cookies can be tailored to suit any palate.
Ready to dive into this delicious recipe? You’ll be amazed at how quickly these gluten free thumbprint cookies become your new favorite.
Ingredients for Gluten Free Thumbprint Cookies
Creating the perfect batch of gluten free thumbprint cookies starts with selecting the right ingredients. Here’s a friendly breakdown of what you'll need to whip up these delightful treats!
Wet Ingredients
To give your cookies that rich and buttery flavor, gather the following wet ingredients:
- ½ cup unsalted butter: Softened to room temperature for easy mixing.
- ¼ cup white sugar: Adds sweetness and lightness to the dough.
- ¼ cup brown sugar: Brings a hint of caramel flavor.
- 1 egg yolk: The secret to a rich texture.
- 1 teaspoon vanilla extract: Enhances the overall flavor profile.
Dry Ingredients
Now, for the dry components that make these cookies gluten-free and delicious:
- 1 ½ cups gluten free all-purpose baking flour: Use a blend that’s designed for baking, like Bob's Red Mill or King Arthur.
- ¼ teaspoon salt: Balances the sweetness beautifully.
Other Ingredients
Lastly, don’t forget to include these crucial elements for that signature touch:
- ¼ cup white sugar: For rolling the cookies, giving them a sparkling finish.
- ⅓ cup raspberry jam or jam of your choice: This will be the sweet center that makes these cookies extra special.
These ingredients not only come together to create scrumptious cookies but also ensure they are suitable for your gluten-free friends! So, let's get baking!
Step-by-step Preparation of Gluten Free Thumbprint Cookies
Making delicious gluten free thumbprint cookies is a fantastic way to indulge your sweet tooth while accommodating dietary needs. These cookies are not just delightful in taste; they're also simple to prepare! Let’s dive into the step-by-step process.
Gather and Prep Your Ingredients
Before you start baking, it's crucial to gather all your ingredients. Here’s a list to make it easier:
- ½ cup unsalted butter
- ¼ cup white sugar
- ¼ cup brown sugar
- 1 egg yolk
- 1 teaspoon vanilla extract
- 1 ½ cups gluten free all-purpose baking flour
- ¼ teaspoon salt
- ¼ cup white sugar (for rolling)
- ⅓ cup raspberry jam or your jam of choice
Make sure your butter is at room temperature to get that creamy texture when mixed with sugar. Prepping your ingredients ahead of time not only speeds up the process but also ensures that you have everything you need right at your fingertips.
Cream the Butter and Sugars
In a medium mixing bowl (or the bowl of a stand mixer, if you have one), combine the softened butter, white sugar, and brown sugar. Beat the mixture with an electric mixer for about a minute until it's fluffy and well-combined. This step is essential for adding that irresistible buttery flavor to your gluten free thumbprint cookies.
Add Egg Yolk and Vanilla
Next, it’s time to elevate the flavor even more! Add the egg yolk and vanilla extract to the butter-sugar mix. Beat again until fully integrated. The egg yolk will give the cookie its richness, while vanilla adds a warm, inviting aroma that will have everyone eagerly waiting for cookie time.
Mix in the Dry Ingredients
Now, gradually add in the gluten-free flour and salt. Mix until just combined; you want to avoid over-mixing here. It's perfectly fine if you see a few small lumps; these will smooth out during baking. Using high-quality gluten-free flour, like Bob's Red Mill or King Arthur, is key for achieving the right texture.
Form the Cookie Dough Balls
Using a small cookie scoop (or a tablespoon), scoop out the cookie dough and form it into balls. Roll each ball in white sugar to ensure they have that lovely sweet crust. Place them on a lined baking sheet, leaving some space between each dough ball for spreading during baking.
Create Indentations and Chill
Use the back of a teaspoon or your thumb to press an indentation into the center of each cookie. This is where all the jam goodness will eventually go! After making the indents, pop the entire baking sheet into the fridge to chill for one hour. Chilling helps the cookies hold their shape and gives you that perfect, soft center.
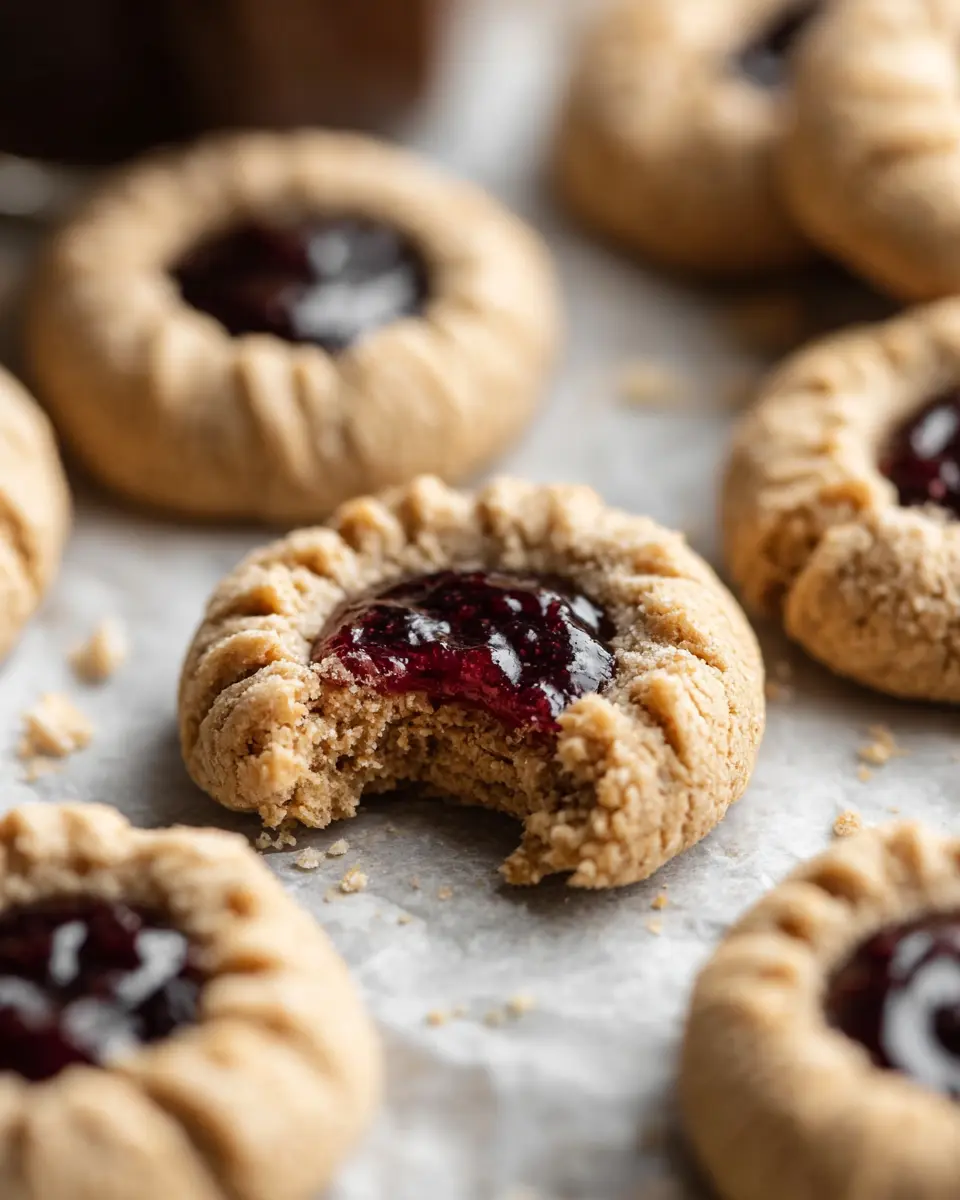
Bake and Add the Jam
Preheat your oven to 350 degrees Fahrenheit toward the end of the chilling time. Once ready, bake the cookies for 12-14 minutes, until the edges turn lightly golden brown. If the indents fill up during baking, simply reshape them gently, then fill each with about a teaspoon of raspberry jam. Allow the cookies to cool on the baking sheet for a few minutes before transferring them to a wire rack.
And there you have it — scrumptious gluten free thumbprint cookies that are certain to impress! Whether you’re serving them at a gathering or savoring them solo, these treats will surely satisfy your cravings. Happy baking!
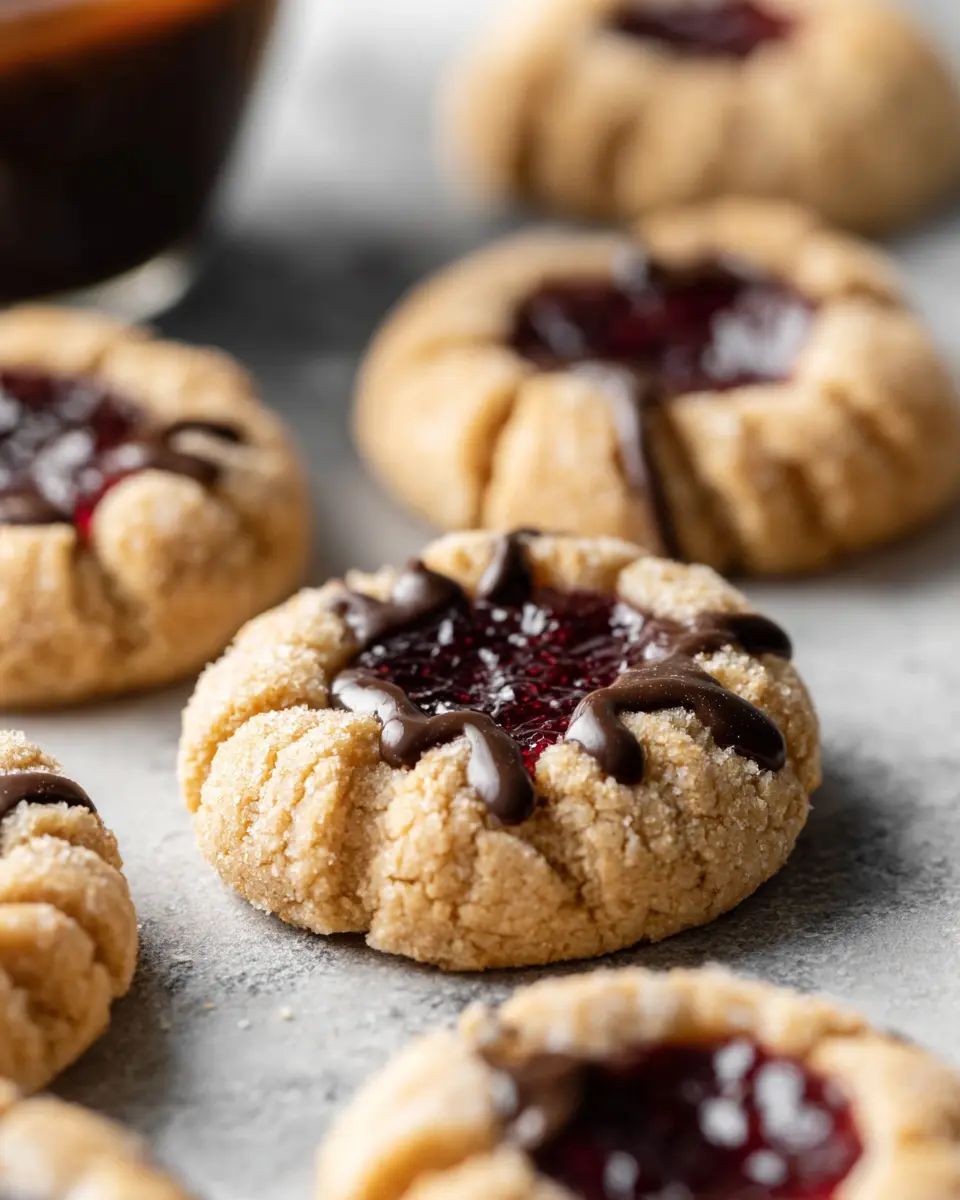
Variations on Gluten Free Thumbprint Cookies
Different jam options
Just like any great recipe, gluten free thumbprint cookies can be customized to suit your taste preferences. While raspberry jam is a classic choice, consider experimenting with other fruity fillings. Here are some delightful alternatives:
- Strawberry jam: A sweeter option that pairs wonderfully with buttery cookie dough.
- Apricot preserves: For a tangy twist, this is a fantastic pick.
- Peanut butter: Not a jam, but trust us; it’s delicious!
Feel free to mix and match based on what you have at home!
Alternative flour blends
If you’re looking to tweak the texture or flavor profile of your gluten free thumbprint cookies, explore different gluten-free flour blends:
- Coconut flour: Adds a slightly sweet, rich flavor but requires some adjustments in moisture.
- Almond flour: Provides a nutty taste and works beautifully for chewy cookies.
- Oat flour: A wholesome option that can give a lovely texture without being too dense.
By experimenting with these alternatives, you can find your perfect cookie match!
Cooking Tips and Notes for Gluten Free Thumbprint Cookies
Perfect Texture Tips
To achieve the ideal texture in your gluten free thumbprint cookies, ensure you use a quality gluten-free all-purpose flour blend, like Bob's Red Mill 1:1 or King Arthur's; both offer excellent results. Spoon and level your flour for accurate measurement—this prevents excess flour, which can toughen your cookies. Chilling the dough for an hour is crucial; it helps solidify the butter, leading to a softer, more tender cookie.
Storage Suggestions
Store your cookies in an airtight container at room temperature for up to five days. If you want to enjoy them longer, consider freezing them. Just place the cooled cookies in a freezer-safe bag; they can last up to three months. Simply thaw them at room temperature and refirm the jam filling for a fresh treat!
Serving Suggestions for Gluten Free Thumbprint Cookies
Ideal Pairings for Coffee or Tea
When enjoying gluten free thumbprint cookies, consider pairing them with a warm cup of coffee or tea for a delightful experience. A rich, medium-roast coffee complements the buttery flavors of the cookies perfectly. For tea enthusiasts, try a floral chamomile or a lightly spiced chai—it adds a nice contrast to the sweetness. A splash of almond milk can enhance these flavors further, creating a cozy afternoon treat.
Presentation Ideas for Gatherings
Elevate your gatherings with beautifully presented gluten free thumbprint cookies. Arrange them on a tiered cake stand for an eye-catching display. You can also place them on a rustic wooden platter adorned with fresh berries or mint leaves for a pop of color. For a festive touch, add decorative napkins or wrap them in clear cellophane tied with a ribbon as thoughtful party favors. Your guests will surely appreciate these delightful treats!
For tips on stunning presentations, check out Martha Stewart’s entertaining guide.
Time Breakdown for Gluten Free Thumbprint Cookies
When it comes to whipping up a batch of these delicious gluten free thumbprint cookies, knowing the time commitment can help you plan just right. Here’s a quick look at the time needed for each step:
Prep Time
15 minutes
Get your ingredients handy and mix them up without any fuss!
Cook Time
15 minutes
Your cookies will need about 12-14 minutes in the oven, allowing a golden finish.
Chill Time
1 hour
Chilling the dough ensures the cookies hold their shape while baking.
Total Time
1 hour 30 minutes
In just an hour and a half, you’ll have fresh, buttery cookies perfect for your next gathering.
These simple timeframes make it easy to enjoy homemade cookies without spending all day in the kitchen. Plus, who can resist the smell of cookies baking? Try pairing these with a cup of coffee for the ultimate treat!
Nutritional Facts for Gluten Free Thumbprint Cookies
Calories per cookie
Each delightful gluten free thumbprint cookie comes in at about 159 calories. This makes them a fantastic treat to indulge in without going overboard on your daily caloric intake.
Key nutritional components
These cookies pack a mix of nutrients to fuel your day:
- Carbohydrates: 24g — Perfect for a quick energy boost.
- Protein: 2g — A little something to help keep you feeling full.
- Fat: 7g (of which 4g is saturated) — Provides a rich, buttery texture that makes these cookies so irresistible.
With ingredients like butter and gluten-free flour, you can enjoy these cookies while still keeping your dietary needs in mind. If you're curious about gluten-free ingredients, check out this informative guide to learn more about alternatives!
FAQs about Gluten Free Thumbprint Cookies
How to make thumbprint cookies if I don’t have gluten free flour?
If you don’t have access to gluten free flour, a fantastic alternative is to use almond flour or coconut flour. Keep in mind, you might need to adjust the quantity and add a binding agent like applesauce or an extra egg to achieve the right consistency. For a buttery flavor, consider adding a bit of butter or coconut oil too!
Can I make these cookies vegan?
Absolutely! To create vegan gluten free thumbprint cookies, substitute the egg yolk with flaxseed meal (1 tablespoon of flaxseed meal mixed with 2.5 tablespoons of water works well). For the butter, use a dairy-free alternative like coconut oil or vegan butter. This way, you can enjoy delicious cookies without compromising your dietary preferences!
How do I store leftover cookies?
Storing your gluten free thumbprint cookies is simple! Place them in an airtight container at room temperature for up to five days. To keep them fresh longer, consider refrigerating them, where they can last for about a week. For even longer storage, you can freeze them. Just ensure they are well-wrapped before popping them in the freezer!
Conclusion on Gluten Free Thumbprint Cookies
If you’re craving a sweet treat that’s both delicious and gluten-free, look no further than these gluten free thumbprint cookies. Soft, buttery, and filled with your favorite jam, they’re perfect for any occasion. Try making them for your next gathering and watch them disappear! Enjoy every bite.
Gluten Free Thumbprint Cookies
Equipment
- mixing bowl
- electric mixer
- baking sheet
- Parchment paper
- cookie scoop
- teaspoon
Ingredients
Wet
- 0.5 cup unsalted butter
- 0.25 cup white sugar for cookie dough
- 0.25 cup brown sugar
- 1 each egg yolk
- 1 teaspoon vanilla extract
Dry
- 1.5 cups gluten free all purpose baking flour
- 0.25 teaspoon salt
Other
- 0.25 cup white sugar for rolling
- 0.33 cup raspberry jam or jam of choice
Instructions
Preparation
- Line a baking sheet with parchment paper and set aside.
- In a medium mixing bowl or bowl of a stand mixer, combine the butter, white sugar and brown sugar and beat with an electric mixer for about 1 minute.
- Add in the egg yolk and vanilla and beat to combine. Beat in the flour and salt until combined.
- Use a small cookie scoop, about 1 tablespoon, and scoop into balls. Roll in the sugar and place on the baking sheet, leaving a bit of space between each cookie.
- Press down slightly, then take the back of 1 teaspoon and press an indent in the center of each cookie.
- Place in the fridge to set for 1 hour.
- Toward the end of the hour, preheat the oven to 350 degrees Fahrenheit.
- Once preheated, bake the cookie for 12-14 minutes or until the edges are lightly golden brown. If the indents have filled in at all, you can reform lightly with the teaspoon, then take about 1 teaspoon of jam to fill in each cookie. Let cool to allow them to firm up, then enjoy!


Leave a Reply