
Introduction to Homemade Cream Puffs
Cream puffs are a delightful treat that many bakery lovers savor, but how about making them at home? These light and airy desserts consist of crispy choux pastry shells that encase fluffy whipped cream, creating a heavenly combination that is simply irresistible. They not only look stunning but taste even better, making them perfect for impressing guests at any gathering or simply enjoying as a weekend treat.
So, why should you take the plunge and try making homemade cream puffs? For starters, it’s an excellent way to hone your baking skills and get acquainted with choux pastry, a cornerstone of French patisserie. The satisfaction of creating these delicate puffs from scratch is truly rewarding, and once you master the technique, you can fill them with all sorts of deliciousness—think pastry cream, custard, or even ice cream!
Not to mention, homemade cream puffs are customizable to your taste. Want to add a hint of chocolate or a splash of vanilla? The options are endless! So roll up your sleeves and let’s explore the art of crafting these delightful desserts—your taste buds will thank you! For more insights on desserts, check out Serious Eats.
Ingredients for Homemade Cream Puffs
Creating delightful homemade cream puffs starts with a few essential ingredients to craft that perfect pâte à choux dough. This French pastry demands:
Essential ingredients for pâte à choux
- 1 ¼ cup (300 ml) water
- 1 teaspoon (4 g) granulated sugar
- ½ teaspoon (2 g) kosher salt
- ½ cup (114 g) unsalted butter, cut into 8 slices
- 1 cup (124 g) all-purpose flour, spooned and leveled
- 4 large eggs
These ingredients come together to create those airy, golden shells that are simply irresistible! For a detailed guide on working with pâte à choux, consider checking out this expert pastry guide.
Ingredients for the whipped cream filling
Once your shells are done, it’s time to whip up a luscious filling with:
- 2 cups (480 ml) heavy whipping cream
- ½ cup (24 g) powdered sugar or granulated sugar
- 1 teaspoon (5 ml) pure vanilla extract
This creamy filling will bring your homemade cream puffs to life. Use high-quality ingredients for the best results, and don’t forget to taste test as you go! Want to learn more about making whipped cream? Check out this informative article on the science of whipping cream. Happy baking!
Preparing Homemade Cream Puffs
Making homemade cream puffs is an enjoyable process that will reward you with delightful pastries that impress everyone. Let’s walk through the steps to create these airy and delicious treats!
Preheat the Oven and Prepare Baking Sheets
Start by setting your oven to 425°F (218ºC). It’s important to have both the upper-middle and lower-middle racks ready for optimal baking. While the oven heats, line two baking sheets with parchment paper; this will prevent your cream puffs from sticking and make cleanup a breeze.
Create the Dough
In a large saucepan, combine 1 cup of water, sugar, salt, and butter. Bring it to a rolling boil, stirring occasionally until the butter fully melts. When it’s bubbling away, turn off the heat and swiftly add the flour. Stir vigorously until the dough forms and starts to pull away from the sides of the pan—around 4 to 5 minutes. This process is crucial for texture!
Cool the Dough Before Adding Eggs
After you’ve created the dough, transfer it to a mixing bowl. Let it cool down by stirring on low speed for about 2-3 minutes. This cooling step is key; it prevents the eggs from curdling when added.
Incorporate Eggs into the Dough
Now it's time to add that richness! Incorporate the eggs one by one, mixing on medium-low speed. Each egg should be fully blended before adding the next. After about three eggs, check the dough consistency; it should be shiny and hold its shape when piped. Depending on your mixture, you might need to add a fourth egg—just mix for a few more seconds.
Pipe the Dough Onto Baking Sheets
Grab your piping bag fitted with a large tip, and fill it with the dough. Pipe 2-inch rounds on your baking sheets, leaving ample space between them to allow for expansion. This part can be a little messy—don’t stress! If you get tails on top, simply dampen your finger and smooth them down.
Brush with Egg Wash for a Beautiful Finish
Whisk together an egg and a tablespoon of water or milk in a small bowl. This will act as your egg wash, giving your cream puffs a beautiful golden sheen as they bake. Brush this mixture lightly over each piped pastry.
Bake to Perfection
Now, it’s time for the oven magic! Bake at 425°F for the first 10 minutes, then gradually lower the temperature. Do not open the oven door during baking! The gradual decrease helps create that perfect hollow shell. Expect about 60 to 70 minutes of baking time.
Prepare the Whipped Cream Filling
While your cream puffs are baking, whip up a batch of whipped cream. In a stand mixer, combine heavy cream, powdered sugar, and vanilla extract. Start on medium-low speed, then increase until soft peaks form. Keep an eye on your mixture—overwhipping can lead to curdled cream.
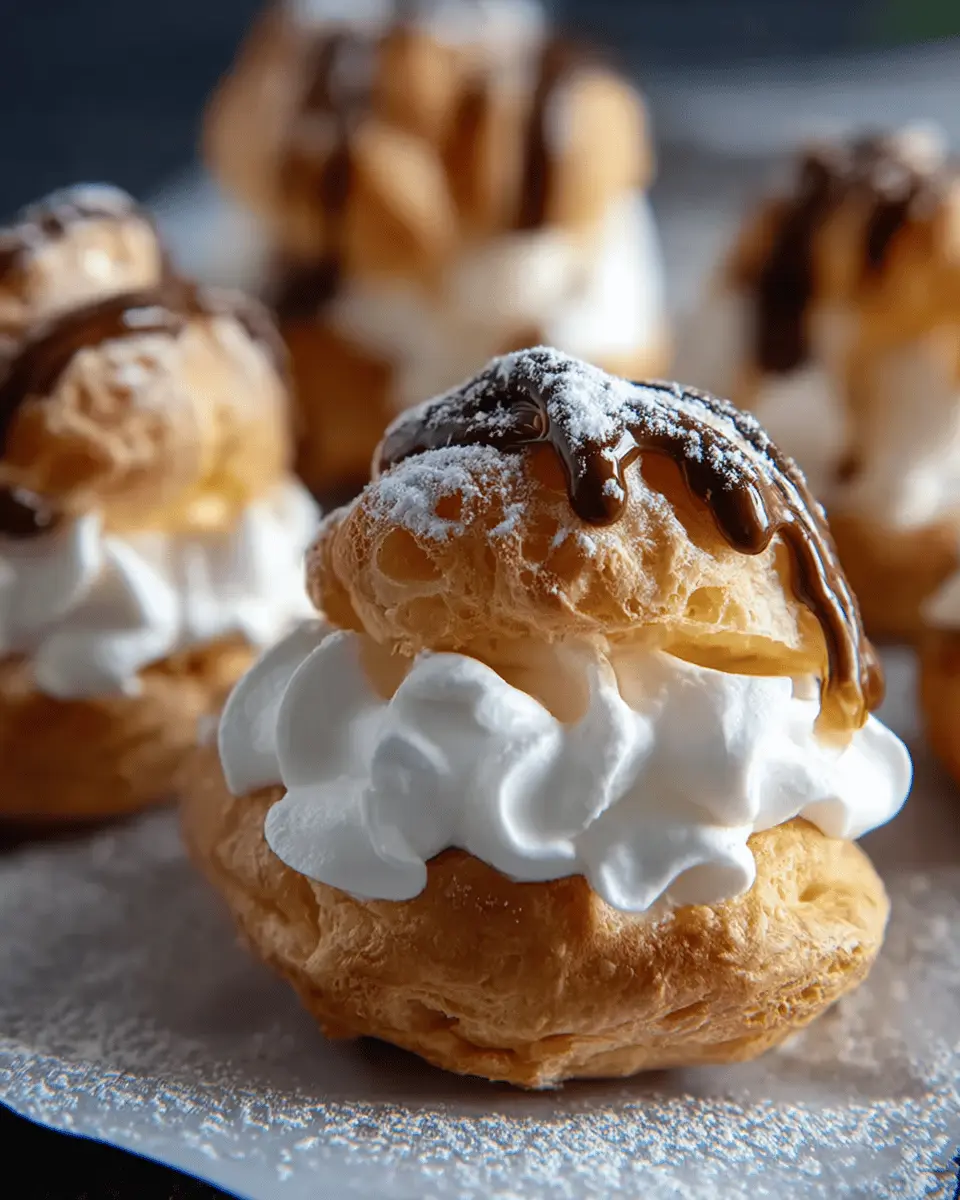
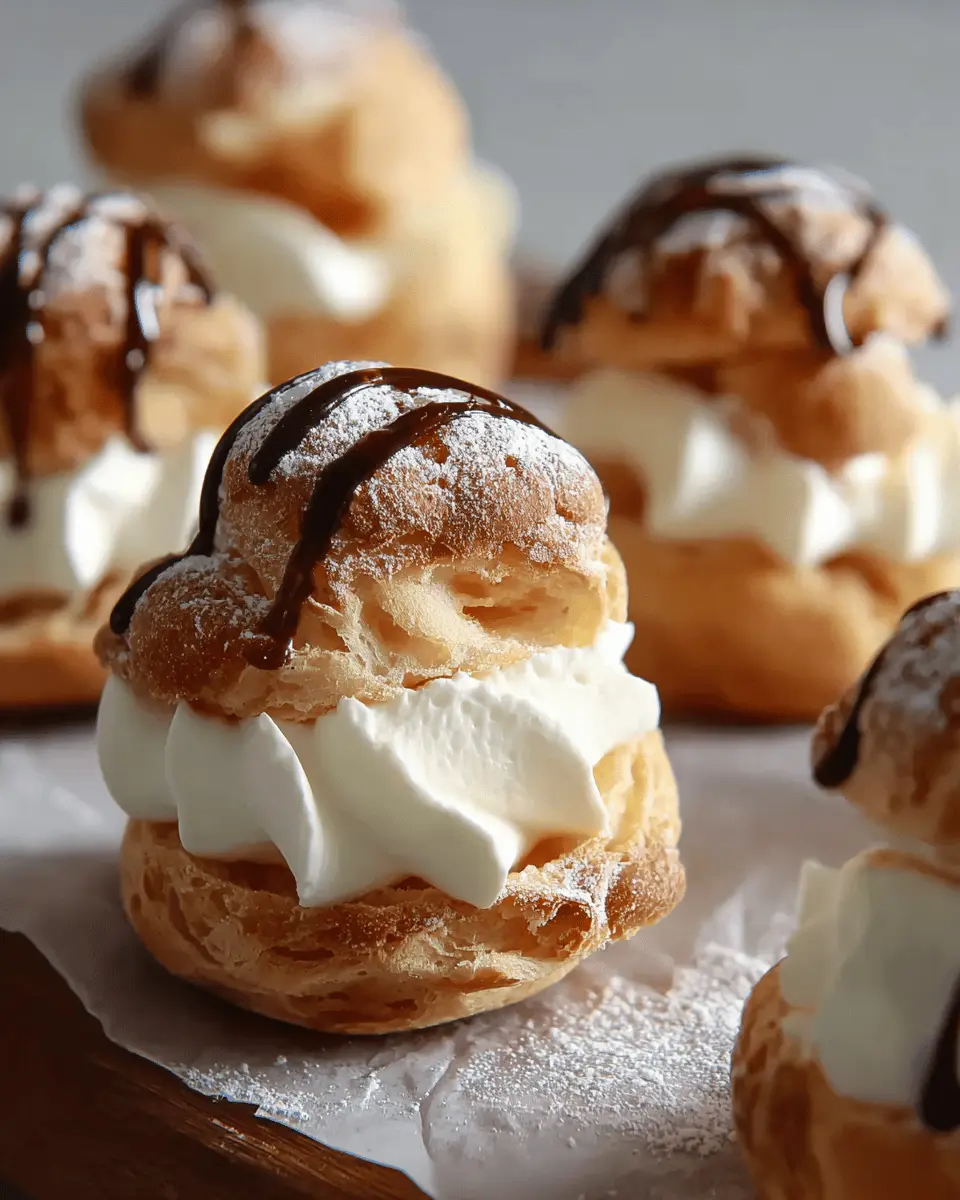
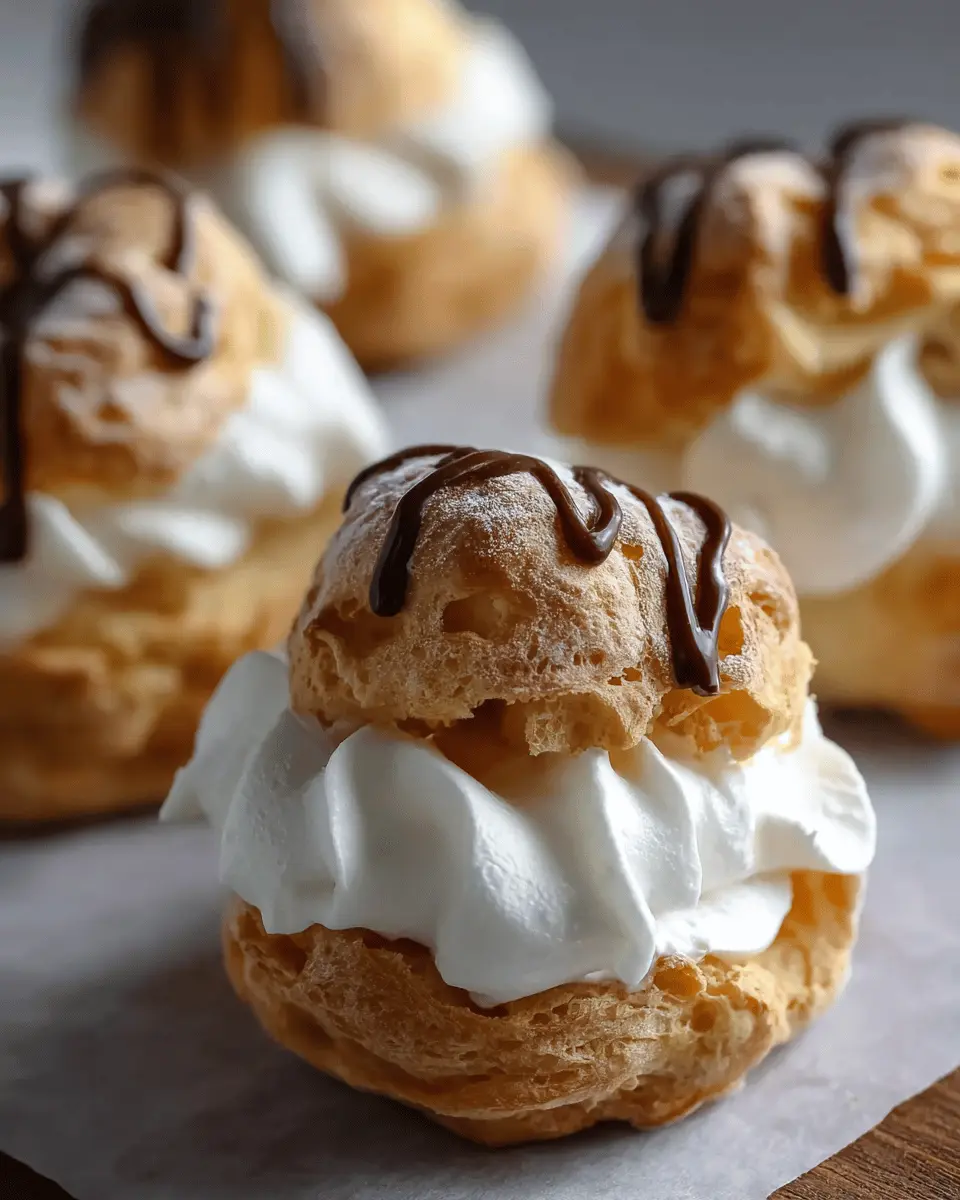
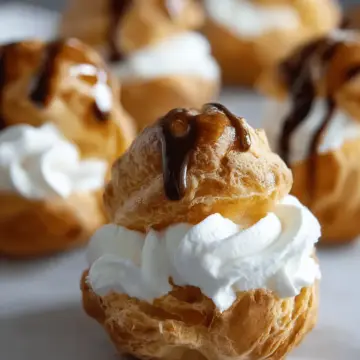
Fill the Cooled Pastry Shells
Once your cream puffs are completely cool, slice them in half. Fill the bottoms with your luscious whipped cream using a piping bag fitted with a star tip, then gently place the tops back on. A dusting of powdered sugar elevates the presentation, making them even more tempting.
By following these steps, you’ll be well on your way to impressing friends and family with your expertly made homemade cream puffs! For additional tips on pastries, you might find classes or workshops beneficial (Check here for local culinary schools). Enjoy your baking adventure!
Variations on Homemade Cream Puffs
Chocolate-Filled Cream Puffs
Why not take your homemade cream puffs to the next level with a rich chocolate filling? Simply melt high-quality dark chocolate and let it cool slightly before folding it into whipped cream. The result? A decadent treat that’s perfect for chocolate lovers. For an added twist, drizzle some chocolate ganache on top for an eye-catching finish.
Fruit-Flavored Whipped Cream Options
Looking for something fruity? Infuse your whipped cream with fresh fruit purées for a delightful twist. Berries, mango, or passion fruit can transform your homemade cream puffs into seasonal sensations. Just blend your chosen fruit, strain it, and incorporate it into your whipped cream for a burst of flavor with every bite. It’s an easy way to add fun and flavor! Try this whipped cream tutorial for expert tips.
Baking Notes for Homemade Cream Puffs
Tips for Achieving the Perfect Pâte à Choux
Creating homemade cream puffs begins with mastering the pâte à choux. Here are some essential tips to ensure your pastry turns out light and airy:
-
Watch the Temperature: When boiling the water and butter, ensure it reaches a full boil before adding the flour. This step is crucial for the right texture.
-
Beat the Dough Well: After adding flour, stir vigorously until the mixture forms a cohesive ball that pulls away from the sides of the pan. This indicates that enough moisture has evaporated.
-
Cool Before Adding Eggs: Allow the dough to cool slightly in the mixer before adding eggs. This prevents the eggs from cooking and ensures a smooth, silky batter.
-
Piping Technique: When piping, make sure to leave space between each puff, as they will expand significantly in the oven. A two-inch gap is perfect!
For more in-depth techniques, consider checking out resources like King Arthur Baking for expert advice on pastry. Experiment and enjoy the process—baking is as much about having fun as it is about following a recipe!
Serving Suggestions for Homemade Cream Puffs
How to Present Your Cream Puffs
When it comes to showcasing your homemade cream puffs, presentation is key! Start by placing them on a beautiful serving platter or a tiered cake stand for a charming display. Dust them with powdered sugar for a touch of elegance, and consider adding a swirl of chocolate or berry sauce on the plate for visual flair.
For added flavor, serve alongside fresh berries or slices of seasonal fruit. To make your dessert more dynamic, why not offer a selection of sauces, such as vanilla custard or tangy lemon curd, allowing guests to customize their experience? With these simple enhancements, your cream puffs will not only taste delicious but look sensational too!
For more inspiration, check out gourmet dessert plating techniques on sites like America’s Test Kitchen.
Tips for Making Perfect Homemade Cream Puffs
Common Mistakes and How to Avoid Them
Creating homemade cream puffs can be a delightful journey, but there are some common pitfalls to watch out for:
-
Under or Overmixing the Dough: Make sure to mix until the dough is smooth and shiny. This consistency is key to achieving the ideal puff.
-
Opening the Oven Door: Resist the urge! Opening the oven too soon can lead to deflated puffs. Keep the door shut to retain heat.
-
Incorrect Oven Temperature: Make sure your oven is correctly calibrated. An inaccurate temperature can cause uneven baking or collapsed pastries. Using an oven thermometer can be helpful.
-
Not Allowing Enough Cooling Time: Patience is essential. Letting the puffs cool properly will prevent sogginess when filled.
By avoiding these common mistakes, you’ll be well on your way to making impressive homemade cream puffs that will wow your friends and family. For more tips on preparing choux pastry, check out Serious Eats.
Time Details for Homemade Cream Puffs
Making homemade cream puffs is not just about the delicious outcome; it’s about enjoying a rewarding cooking experience! Here’s a quick look at the time you'll need to bring these delightful treats to life.
Preparation Time
Get everything ready in about 30 minutes. This includes gathering your ingredients and preparing the pâte à choux dough.
Cooking Time
These puff pastries take some patience with a baking time of approximately 1 hour and 15 minutes. Don’t forget to follow the gradual baking process for perfectly puffed shells!
Total Time
From start to finish, expect to spend around 1 hour and 45 minutes creating your delightful homemade cream puffs. It’s totally worth the time for that crispy, airy treat filled with creamy goodness!
For more insights on mastering choux pastry, check out Serious Eats, a great resource for home chefs. Don’t rush the process; savor each step to ensure your cream puffs turn out just right!
Nutritional Information for Homemade Cream Puffs
Calories per Serving
Each of these delightful homemade cream puffs has about 116 calories. That's a perfect treat for those moments when you want something sweet but not overly indulgent.
Breakdown of Macronutrients
These cream puffs not only satisfy your sweet tooth but also offer a balanced macronutrient profile:
- Carbohydrates: 10g
- Protein: 3g
- Fat: 7g (of which 4g is saturated fat)
The combination of ingredients gives a delectable bite while keeping it relatively light. Enjoy your cream puffs knowing they’re a lovely little indulgence! For more details on dessert nutrition, check out this resource from the USDA.
Feel free to explore variations or add fruits for additional flavors and nutrients!
FAQs about Homemade Cream Puffs
Can I make cream puffs ahead of time?
Absolutely! You can prepare homemade cream puffs ahead of time by baking the shells in advance and storing them. Once they cool, keep them in an airtight container at room temperature for up to five days or freeze them for a month. Just remember to re-crisp them before filling by popping them back in a low oven for a few minutes. This will regain their light and crispy texture.
What are the best storage practices for cream puffs?
For the best experience, it’s ideal to fill your cream puffs just before serving. If you have leftovers, store them in the fridge uncovered for up to three days. This helps maintain their texture by preventing sogginess. For filled cream puffs, consuming them within the first day is best; they’re tastiest fresh!
How can I customize the filling?
The filling is where you can really get creative! While whipped cream is classic, feel free to swap it with flavored options like chocolate mousse, pastry cream, or even fruit compote. Adding extracts or citrus zest can also elevate your homemade cream puffs to a new level of deliciousness. Explore recipes for different fillings to find your perfect match! For more ideas, check out this guide on popular cream fillings.
Conclusion on Homemade Cream Puffs
Making homemade cream puffs is not just about indulging in a delightful dessert; it's about creating something delicious from scratch. This classic French treat elevates any gathering—plus, who doesn’t love the magic of light, airy pastry filled with whipped cream? Trust us, your friends will be impressed!
Why You Should Try Making Cream Puffs at Home!
- Satisfaction of DIY: There’s a unique joy in preparing these pastries yourself. It’s not just cooking; it’s a fun kitchen experiment that can elevate your baking skills.
- Customize to Your Taste: You can fill them with whipped cream, custard, or even fruit for a twist! The options are endless.
- Impress Your Guests: They make for a stunning dessert to serve at parties or family gatherings, sure to wow anyone who gets a taste.
- Affordable and Fresh: Save money by making your own rather than buying from a bakery, with the advantage of fresh ingredients and no preservatives.
So why wait? Grab your apron and dive into the delightful world of homemade cream puffs. Whether you enjoy them fresh or filled, this lovely dessert could become a highlight of your culinary repertoire. Happy baking! For more dessert ideas, check out King Arthur Baking for tips and inspiration!
Homemade Cream Puffs: Easy Tips for Irresistibly Light Treats
Equipment
- stand mixer
- Cooling Rack
- Pastry Bag
- Plain Pastry Tip
- Star Pastry Tip
Ingredients
Pâte à Choux
- 1.25 cup water, divided
- 1 teaspoon granulated sugar
- 0.5 teaspoon kosher salt
- 0.5 cup unsalted butter, cut into slices
- 1 cup all-purpose flour, spoon and leveled
- 4 large eggs
- 0.25 cup powdered sugar, for dusting
Egg Wash
- 1 large egg
- 1 tablespoon water, or milk
Whipped Cream (4 cups)
- 2 cups heavy whipping cream, or heavy cream
- 0.5 cup powdered sugar, or granulated sugar
- 1 teaspoon pure vanilla extract
Instructions
Instructions
- Preheat the Oven - Set the oven racks to upper-middle and lower-middle positions. Preheat to 425°F (218ºC). Line two sheet pans with parchment paper and set them aside.
- Make the Dough - In a large heavy-bottomed saucepan, add 1 cup of water, sugar, salt, and butter. Bring to a boil over medium-high heat and stir until the butter fully melts, about 2 minutes.
- Cool the Dough - Transfer the dough to a bowl of a stand mixer fitted with a paddle. Slowly stir on low speed (setting 2) to cool to 130°F (54ºC) or just below, about 2 to 3 minutes.
- Add the Eggs in Stages - Add eggs one at a time, mixing on medium-low speed (setting 4) until each egg is fully incorporated, about 30 to 45 seconds per egg.
- Piping the Dough - Add a large plain tip to a piping bag and pipe onto the sheet pan, creating a 2-inch circular ball. Pipe at least 2 inches apart from each other.
- Brush on Egg Wash - In a small bowl, whisk together one egg and 1 tablespoon of water. Brush the tops and sides of each dough ball with the egg wash.
- Gradual Baking Process - Place the sheet trays in the upper-middle and lower-middle positions. Bake for 10 minutes at each temperature setting: 425°F (218ºC), 375°F (191ºC), 325°F (163ºC), 275°F (135ºC), 225°F (107ºC), 200°F (93ºC).
- Make the Whipped Cream - In a stand mixer fitted with the whisk attachment, add heavy cream, powdered sugar, and vanilla extract to the bowl. Whip until smooth, stiff peaks form, about 2 minutes.
- Piping the Cream - Working in batches, add the whipped cream to a pastry bag fitted with a large star tip. Pipe the whipped cream into the pastry bottoms.
- Top with Sugar - Sprinkle powdered sugar on top of each cream puff. Serve immediately, or refrigerate, uncovered, if not eating within one hour.
Leave a Reply