
Introduction to Honey Garlic Chicken
Why Homemade Honey Garlic Chicken is a Game Changer
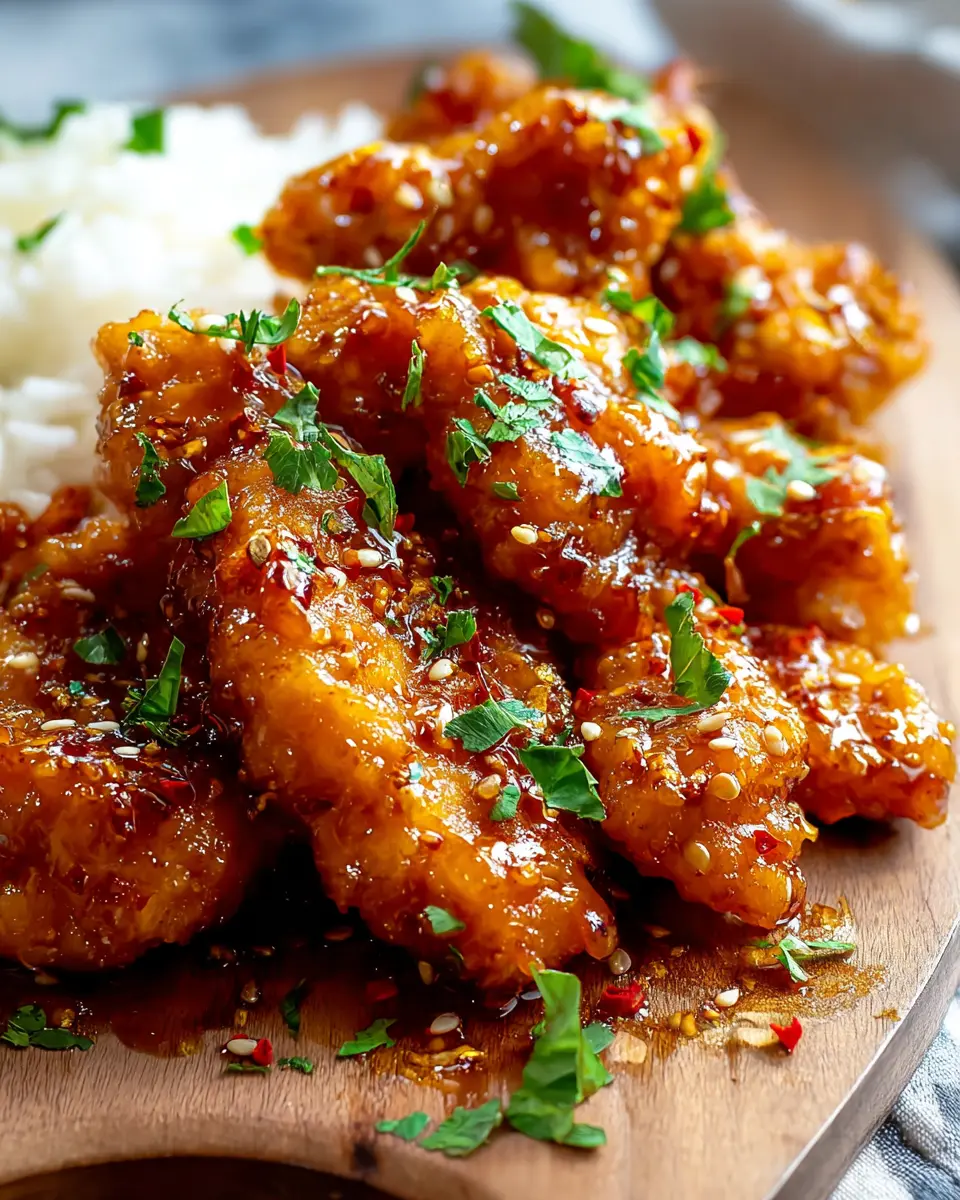
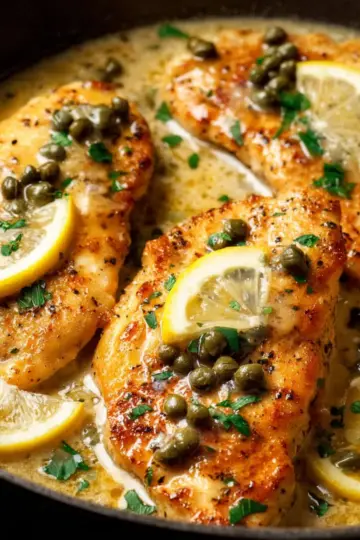
If you're looking to elevate your weeknight dinner with minimal fuss, honey garlic chicken is where it’s at. With just a handful of ingredients and a cooking time of only 20 minutes, this dish transforms simple chicken thighs into a sticky, flavorful masterpiece that even your pickiest eaters will love.
Imagine biting into tender chicken coated in a delectable sauce made from honey, garlic, and soy sauce, all balanced out by a touch of rice vinegar. Not only does it taste amazing, but making it at home also means you have full control over the flavors and ingredients. Hungry for a healthier alternative? You can swap ingredients to better suit your dietary needs, such as using tamari for a gluten-free option or even swapping chicken thighs for breast, depending on your preference.
It's versatile—pair it with steamed rice, toss it in a salad, or even use it in wraps for lunch the following day. The opportunities for creativity are endless! Plus, the satisfying aroma that fills your kitchen as you cook will leave everyone eager to gather around the dinner table. If you're ready to impress at your next meal, let’s dive into the details.
Ingredients for Honey Garlic Chicken
Essential ingredients you'll need
To create a flavorful honey garlic chicken dish, you’ll need the following essential ingredients:
- 8 chicken thighs (skinless and boneless): They provide tender and juicy meat.
- 2 tablespoon cornflour (cornstarch): This helps create a crispy exterior.
- ½ teaspoon salt & pepper: For seasoning the chicken.
- 2 tablespoon vegetable oil & 1 tablespoon unsalted butter: These fats ensure the chicken cooks perfectly.
- 4 cloves minced garlic: The star ingredient of the sauce.
- 110 g (⅓ cup) honey: For natural sweetness and stickiness.
- 80 ml (⅓ cup) chicken stock: Adds depth to the sauce.
- 1 tablespoon rice vinegar & 1 tablespoon light soy sauce: For a tangy and savory flavor.
Optional ingredients and variations
Feel free to customize your honey garlic chicken with these optional ingredients for added flair:
- Chili flakes for some heat.
- Fresh herbs, like parsley or green onions, for garnishing.
- Vegetables, such as bell peppers or broccoli, to amp up the nutrition and color.
Looking to switch things up? You might enjoy using tamari for a gluten-free version or swapping chicken thighs for chicken breasts for a leaner option. Get creative and make this dish your own! For more tips on ingredient substitutions, check out this cooking guide.
Preparing Honey Garlic Chicken
If you're in the mood for a quick and delicious meal, honey garlic chicken is the way to go. It's simple, yet packs a punch of flavor with just a few ingredients. Let’s dive into how to prepare this mouthwatering dish step by step!
Prepare the chicken thighs
To kick things off, grab about 8 skinless and boneless chicken thighs. They're ideal for this recipe because they remain juicy and flavorful, even with high-heat cooking. In a mixing bowl, combine the chicken with 2 tablespoons of cornflour (cornstarch), along with a pinch of salt and pepper. Toss everything together until each piece is well coated. This little step ensures a crispy texture on the outside while keeping the insides succulent. If you want, you can also try using chicken breasts, but do keep in mind they may cook a bit differently.
Heat your skillet
Next, let's get that skillet heated! Pour in 2 tablespoons of vegetable oil into a large frying pan. Make sure it’s over medium-high heat. You'll want the oil shimmering before you add the chicken; this helps achieve that beautiful golden-brown crust we all love. If you're curious about what type of frying pans work best, check out this guide on frying pans and skillets.
Cook the chicken to golden perfection
Once the oil is ready, carefully add your chicken thighs to the skillet. Let them cook undisturbed for about 4-5 minutes on one side. You'll know they’re ready to flip when they’ve turned that delicious golden brown color. After flipping, let them cook for another 2 minutes. This initial browning makes a great flavor base for your honey garlic chicken.
Make the delicious honey garlic sauce
Now, let's move on to the star of the show—the sauce! In a small bowl, whisk together ⅓ cup of honey, ⅓ cup of chicken stock, 1 tablespoon of rice vinegar, and 1 tablespoon of light soy sauce. Stir until everything is well blended. Once the chicken is nearly cooked through, reduce the heat to medium and add 1 tablespoon of unsalted butter and 4 cloves of minced garlic into the skillet. Stir to combine, making sure not to burn the garlic!
Bring everything together
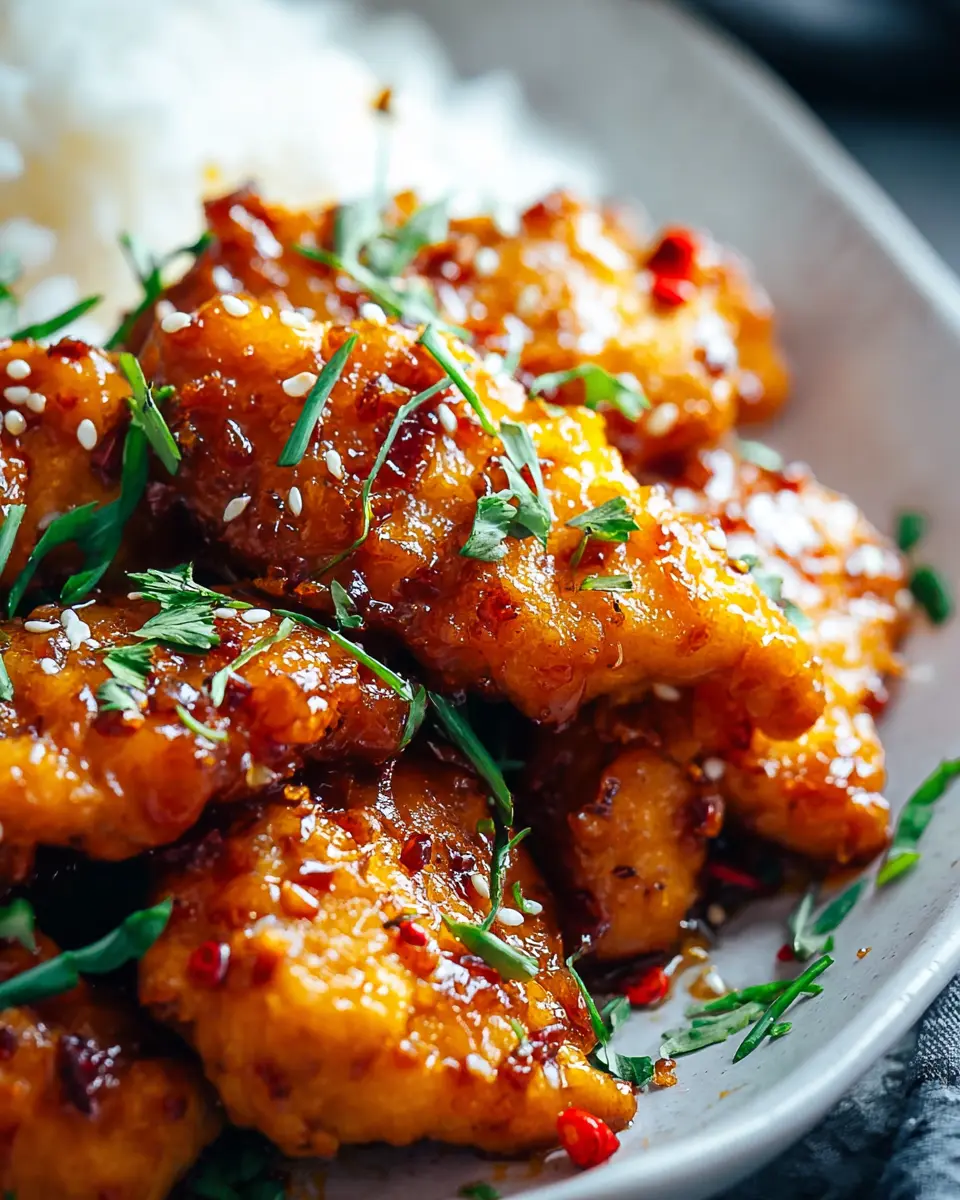
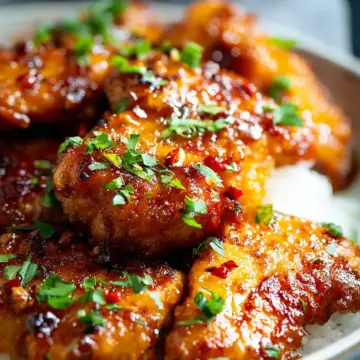
Finally, pour your freshly made honey garlic sauce into the skillet. Turn the heat up to bring it to a gentle boil. Let this simmer for about 4-5 minutes, allowing the sauce to reduce and thicken up while the chicken finishes cooking. You’ll know it’s done when the sauce clings beautifully to the chicken, giving you that sticky, sweet glaze. Once plated, sprinkle with fresh parsley and a pinch of chili flakes for a pop of color and flavor. Serve this scrumptious honey garlic chicken over boiled rice (check the perfect rice method here).
And there you have it—delicious, restaurant-quality honey garlic chicken ready in about 20 minutes! Enjoy!
Variations on Honey Garlic Chicken
Honey Garlic Chicken with Veggies
For a colorful twist, try adding a mix of vibrant veggies like bell peppers, broccoli, and snap peas to your honey garlic chicken. Just sauté them alongside the chicken during the last few minutes of cooking. Not only does this make your dish more nutritious, but it also brings a delightful crunch and fresh flavor that pairs beautifully with that sticky, sweet sauce. Plus, it’s a great way to get your daily dose of vegetables!
Honey Garlic Chicken Over Stir-Fried Rice
Elevate your honey garlic chicken experience by serving it over stir-fried rice. Simply warm up some rice and toss it in a hot pan with a splash of soy sauce, green onions, and your choice of protein or tofu. Once combined, ladle your velvety chicken on top for a satisfying meal. This not only amplifies the dish's flavors but also gives you that coveted one-bowl dinner experience—easy, delicious, and perfect for busy weeknights!
For more rice tips, check out this guide on how to boil rice.
Cooking Notes for Honey Garlic Chicken
Tips for Achieving the Perfect Sauce
To create a sticky, rich sauce that clings beautifully to your honey garlic chicken, be sure to let it simmer for at least 4-5 minutes after adding the sauce to the pan. This not only thickens the sauce but also deepens its flavor. Stir occasionally to prevent burning and ensure an even coating on the chicken. If you desire a glossy finish, consider adding a teaspoon of sesame oil at the end!
Substitutions for a Healthier Version
If you’re looking for a lighter take on this dish, swap out the honey for agave syrup, which has a lower glycemic index. You can also use low-sodium soy sauce and replace the chicken thighs with skinless chicken breasts for fewer calories. To up the nutrition factor even more, toss in some steamed broccoli or snap peas for a colorful and healthful addition!

Serving suggestions for Honey Garlic Chicken
What to pair with your honey garlic chicken
When serving your honey garlic chicken, consider a side of fluffy boiled rice to soak up the delicious sauce. Alternatively, steamed vegetables like broccoli, snap peas, or carrots add vibrant color and crunch. For a twist, try serving it with quinoa or cauliflower rice for a nutritious balance.
Creative serving ideas
Elevate presentation by plating your honey garlic chicken on a bed of rice, garnished with fresh parsley and a sprinkle of chili flakes. For a family-style meal, serve it in a large dish, allowing guests to help themselves. You can even turn it into a wrap by placing the chicken in tortillas with crunchy veggies for a quick lunch option. Explore more serving ideas at CookingLight.
Experiment with flavors, and enjoy the delicious versatility of your honey garlic chicken!
Time Breakdown for Honey Garlic Chicken
Preparation Time
Getting started on your honey garlic chicken is a breeze with just 5 minutes of prep! This quick phase includes gathering your ingredients and seasoning the chicken thighs, setting you on the fast track to a delicious meal.
Cooking Time
Once prepped, the real magic happens during the 15 minutes of cooking. You’ll sauté the chicken until it’s perfectly golden and then create that irresistible garlic sauce that’ll have your taste buds singing!
Total Time
In just 20 minutes, you’ll have a mouthwatering dish ready to serve. It’s perfect for those busy weeknights when you want something flavorful without spending hours in the kitchen. You can pair this honey garlic chicken with boiled rice for a satisfying meal.
For more tips on cooking rice perfectly, you can check out this guide on how to boil rice. Enjoy your cooking adventure!
Nutritional Facts for Honey Garlic Chicken
When considering the health benefits of this delicious Honey Garlic Chicken, here’s what you can expect in each serving:
Calories
This dish contains approximately 472 calories, making it a satisfying option for a filling dinner without overindulging.
Protein
Packed with 45 grams of protein, honey garlic chicken provides a great source of lean protein, essential for muscle repair and overall health.
Sugar Content
With around 24 grams of sugar, the sweetness mostly comes from honey, adding a delightful flavor while giving a quick energy boost.
Make sure to balance out the honey garlic chicken with plenty of veggies or a side of boiled rice for a nutritious meal. For more details about the ingredients used, check out this resource on honey.
FAQs about Honey Garlic Chicken
Can I use chicken breasts instead of thighs?
Absolutely! While chicken thighs are known for their juiciness, you can definitely swap them for chicken breasts if you prefer. I recommend slicing the breasts into thick strips or flattening them a bit with a rolling pin. This ensures they cook evenly and stay moist, giving you that delicious honey garlic chicken experience you're looking for.
How can I store leftovers?
Storing leftovers is easy! Simply let your remaining honey garlic chicken cool, then place it in an airtight container in the refrigerator. It should stay fresh for up to three days. When you're ready to enjoy it again, reheat in the oven at 180°C (350°F) for 12-15 minutes, covering it with foil to keep it from drying out.
Is this recipe gluten-free?
Yes, you can make this honey garlic chicken gluten-free! Just replace the regular soy sauce with tamari, and use gluten-free chicken stock. Check that your rice vinegar is also gluten-free to keep your meal safe for anyone with gluten sensitivities. To learn more about gluten-free cooking, check out resources like Celiac Disease Foundation.
Conclusion on Honey Garlic Chicken
In conclusion, honey garlic chicken is a versatile dish that’s perfect for busy weeknights. With minimal ingredients and quick preparation, this recipe brings bold flavors to your table in just 20 minutes. Savor the sticky sweetness and tender chicken as you share this delightful meal with loved ones!
For more cooking inspiration, check out sites like Serious Eats or The Kitchn for a variety of unique recipes!
Honey Garlic Chicken
Equipment
- frying pan (skillet)
Ingredients
- 8 thighs chicken (skinless and boneless)
- 2 tablespoon cornflour (cornstarch)
- ½ teaspoon salt
- ½ teaspoon pepper
- 2 tablespoon vegetable oil
- 1 tablespoon unsalted butter
- 4 cloves minced garlic
- 110 g honey (⅓ cup)
- 80 ml chicken stock (⅓ cup)
- 1 tablespoon rice vinegar
- 1 tablespoon light soy sauce
To Serve
- 1 tablespoon finely chopped fresh parsley
- ½ teaspoon chilli flakes
- boiled rice
Instructions
- Place the chicken thighs in a bowl and add the cornflour (cornstarch), salt, and pepper. Toss the chicken in the cornflour until fully coated.
- Heat the oil in a large frying pan (skillet) over high heat.
- Add the chicken thighs, and cook on one side until golden brown (about 4-5 minutes), then turn over and cook for a further 2 minutes.
- Add the butter to the pan, let it melt, then add the garlic and stir together. Turn the heat down to medium so the garlic doesn't burn, then make the sauce.
- To make the sauce, combine the honey, stock, rice vinegar, and light soy sauce in a bowl and stir together.
- Add the sauce to the pan. Turn the heat up and bring the sauce to the boil, then simmer for 4-5 minutes until the sauce reduces and thickens, and the chicken is cooked through (and no longer pink in the middle).
- Sprinkle on the chopped parsley and chilli flakes and serve over boiled rice.

Leave a Reply