
Introduction to Simply Sandwich Bread
There’s something undeniably joyful about the aroma of homemade bread wafting through your kitchen. Making your own simply sandwich bread not only fills your home with warmth but also offers a fresher alternative to store-bought varieties. With just a few simple ingredients, you can create a loaf that elevates your lunchtime routine to new heights.
What makes this bread stand out? Firstly, it’s incredibly versatile. Whether you’re crafting a classic turkey bacon sandwich, a savory chicken ham creation, or an artisanal grilled cheese, this bread serves as the perfect canvas. Plus, baking at home often means skipping preservatives and artificial ingredients, ultimately making healthier choices for yourself and your loved ones.
The process itself can be a delightful experience. From kneading the dough to watching it rise, you’ll find a deep satisfaction in crafting something from scratch. If you need any tips along the way, resources like Sally's Baking Addiction provide excellent guidance on baking techniques and ingredient specifics.
So, roll up your sleeves and let’s dive into the delicious world of making simply sandwich bread. You’ll be amazed at how a little time and effort can yield something so rewarding!
Ingredients for Simply Sandwich Bread
Basic Ingredients Overview
Creating delicious simply sandwich bread starts with a handful of essential ingredients that work together to give you that perfect loaf:
- Warm Water: 1 cup, warmed to about 110°F (43°C) for activating the yeast.
- Yeast: 2 and ¼ teaspoons (1 packet) of instant yeast for a reliable rise.
- Sugar: 2 tablespoons to feed the yeast and add a touch of sweetness.
- Unsalted Butter: 4 tablespoons, softened for a rich flavor.
- Salt: 1 and ½ teaspoons to balance flavors.
- Flour: 3 and ⅓ cups of all-purpose or bread flour for structure and texture.
These straightforward components come together to create a soft, flavorful loaf suitable for everything from classic peanut butter sandwiches to turkey bacon delights.
Special Ingredients Notes
While most of the ingredients are common pantry staples, here are a couple of pointers to consider:
- Yeast: Opt for Platinum Yeast from Red Star. It's known for its superior performance, helping your bread rise beautifully and consistently. Learn more about using yeast here.
- Flour Varieties: All-purpose flour is perfectly fine, but using bread flour will yield a chewier texture. If you're curious about the differences, check out this comprehensive guide on flour types.
With these ingredients in hand, you're well on your way to baking your very own simply sandwich bread! Happy baking!
Preparing Simply Sandwich Bread
Baking your own bread at home can be an incredibly rewarding experience, and simply sandwich bread is a great place to start! The process can be broken down into a few straightforward steps, making it accessible even for beginners. Let's dive in!
Prepare the Dough
To kick off your simply sandwich bread, whisk together warm water, warm milk, yeast, and sugar in the bowl of your stand mixer. It's essential that the water is around 110°F (43°C) for the yeast to thrive. After you mix, let the mixture rest for about 5 minutes — this activates the yeast, giving your bread that lovely rise. If you don’t have a stand mixer, feel free to use a large mixing bowl and a wooden spoon — it will take some elbow grease, but it’s totally doable!
Knead the Dough
Once your dough is blending together, it’s time for some kneading. Continue mixing at low speed by adding butter, salt, and flour. After the initial mix, you’ll knead the dough until it’s soft and slightly tacky, which usually takes about 5-8 minutes. If you're feeling unsure about how to knead, check out this helpful kneading guide that simplifies the technique.
First Rise of the Dough
Once your dough feels just right, gently place it in a greased bowl, turning it to coat with oil. Now, cover it and let it rise in a warm spot for about 1-2 hours, or until it doubles in size. This is one of the most magical parts of bread-making — watching your dough transform!
Shape the Bread
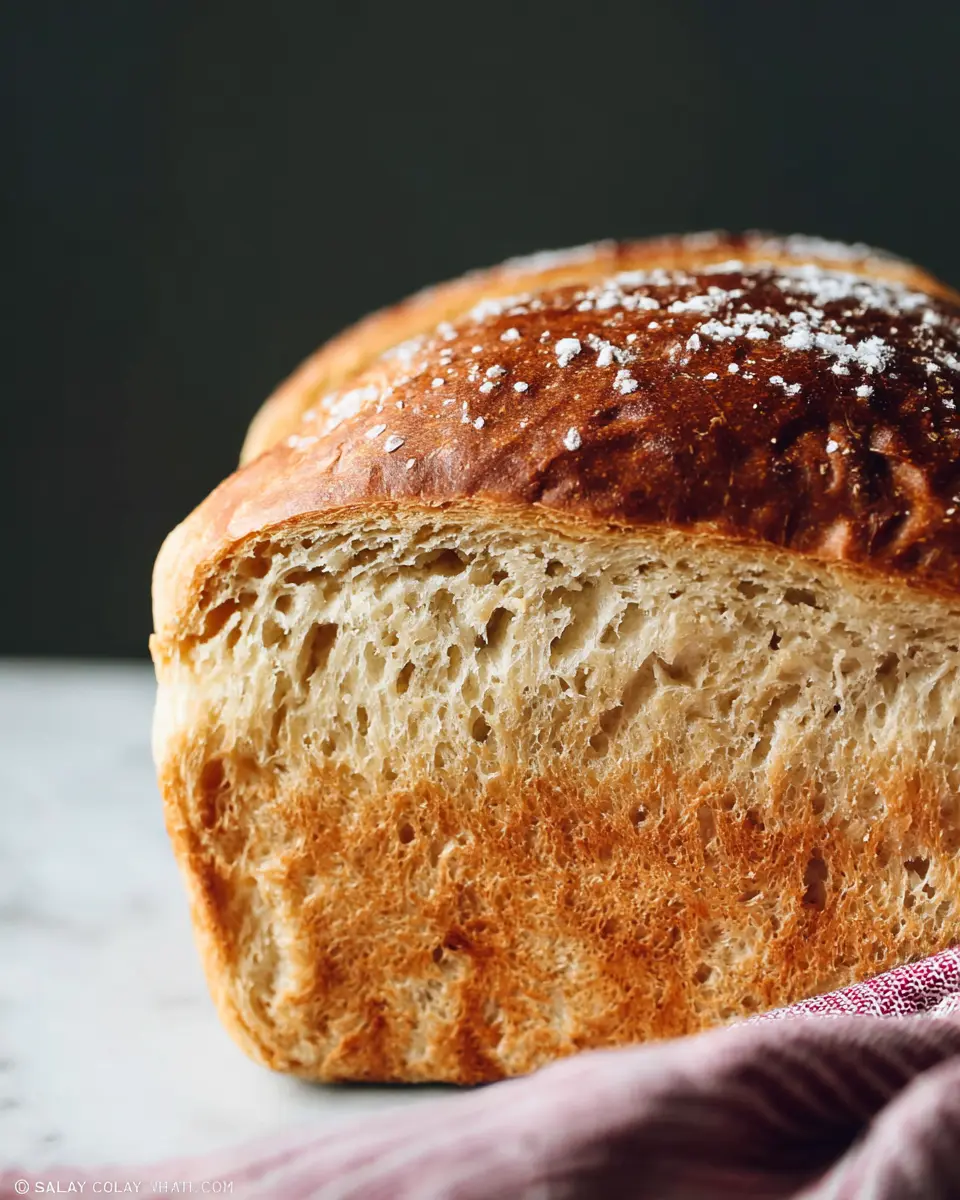
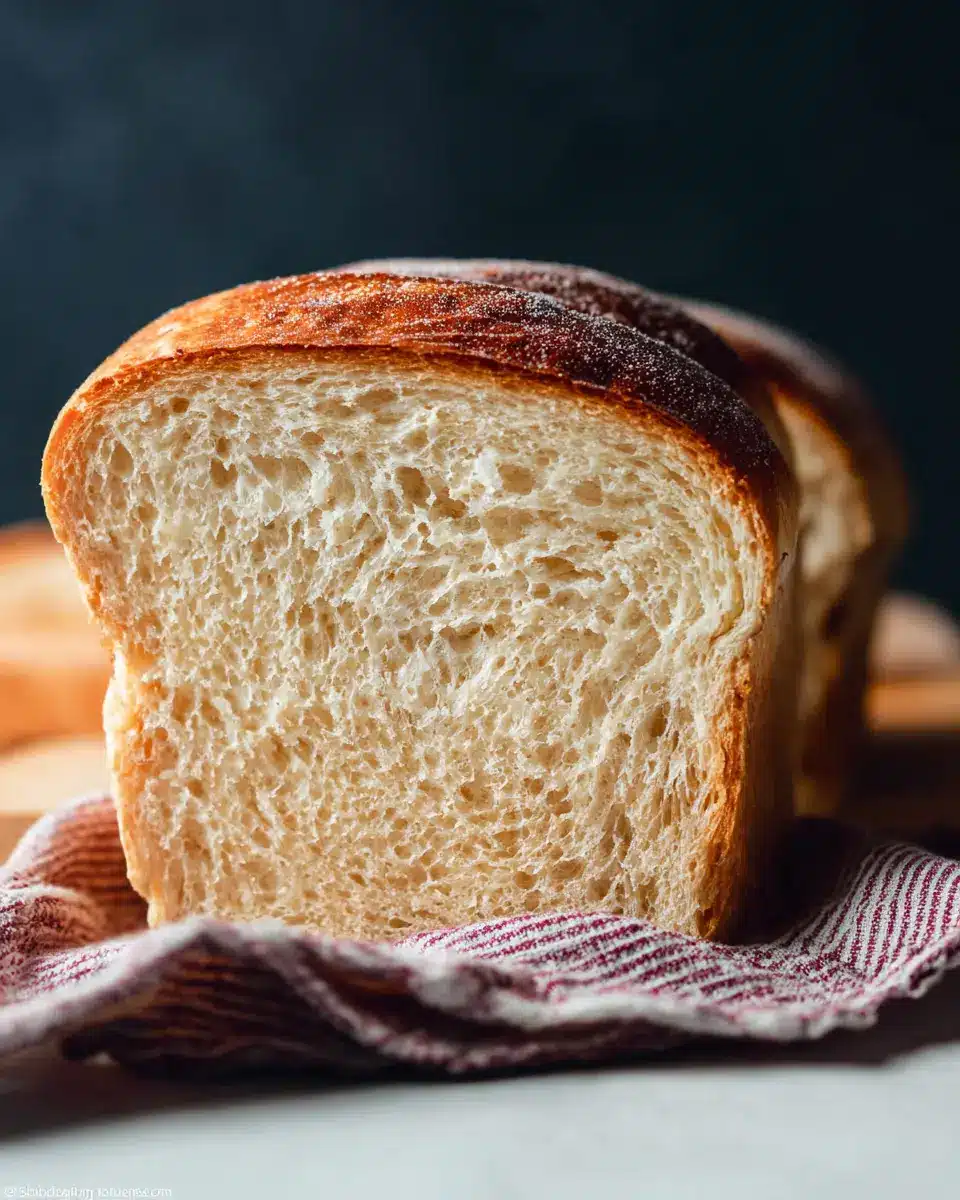
When your dough has risen beautifully, it’s time for shaping. Punch it down to release the gas, then turn it out onto a floured surface. Roll it into a rectangle about 8×15 inches, then roll it up tightly to form a log. Place the log in a greased 9×5-inch loaf pan — it doesn’t need to be perfect, as slight imperfections can add character to your simply sandwich bread.
Second Rise and Baking the Bread
After shaping, cover the loaf with a cloth or plastic wrap and let it rise again for about an hour, or until it’s about an inch above the pan rim. During the last few minutes of rising, preheat your oven to 350°F (177°C). Bake your bread for 32-36 minutes. The smell will be heavenly! If the top browns too quickly, tent it with some aluminum foil. Your bread is done when it sounds hollow when tapped and registers between 195-200°F (90-93°C) on a thermometer.
Let the bread cool for a few minutes in the pan before transferring it to a wire rack. Now, you’re ready to slice and enjoy! Remember, homemade bread can be stored for up to six days at room temperature, but good luck keeping it around that long!
By following these simple steps, you'll be left with a delicious loaf that's perfect for sandwiches, toast, or simply enjoying with butter. Happy baking!
Variations on Simply Sandwich Bread
Whole Wheat Sandwich Bread
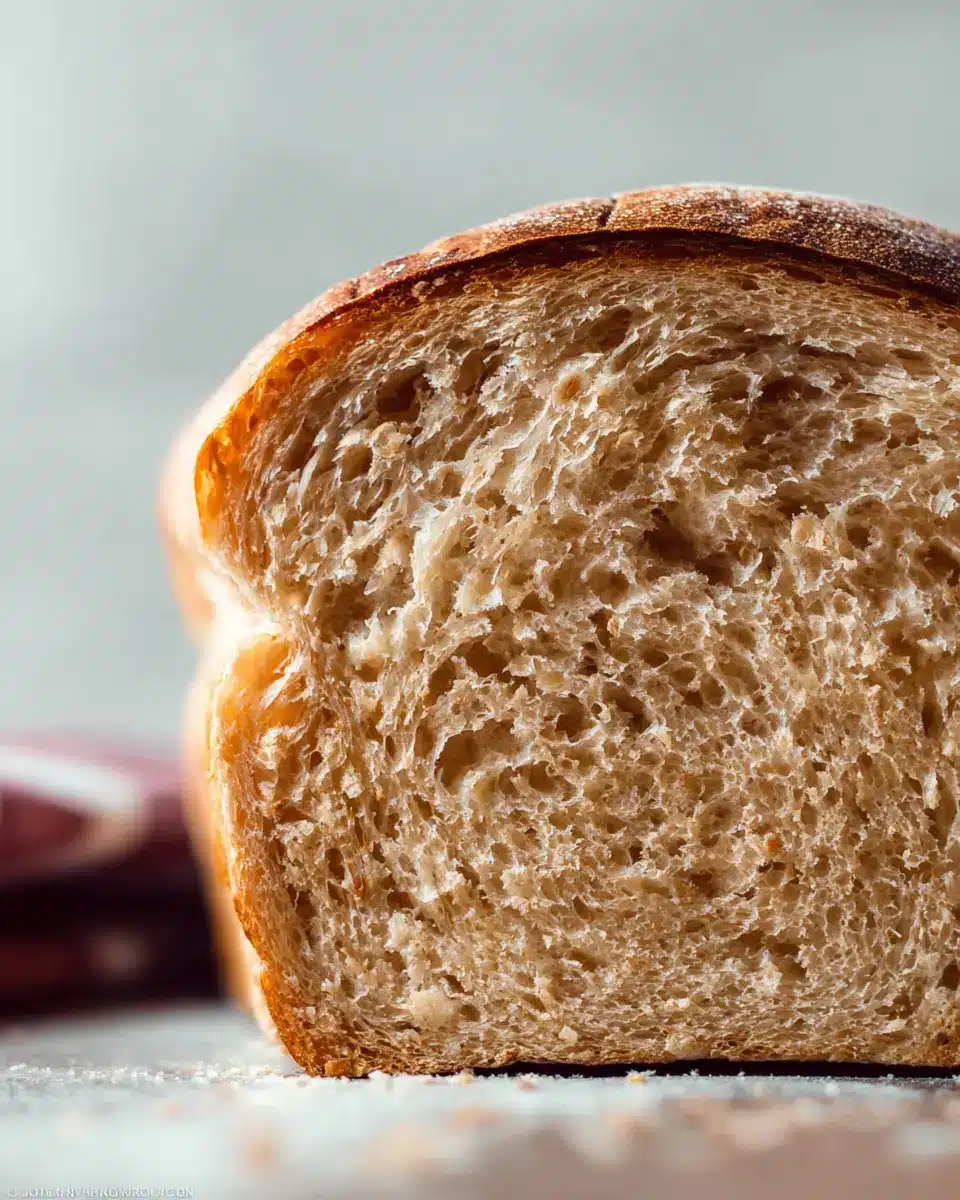
Looking for a healthier twist on your simply sandwich bread? Whole wheat flour is a perfect alternative that adds flavor and nutrients. When substituting, use 2 to 2.5 cups of whole wheat flour combined with all-purpose for the best texture. This variation not only provides more fiber but also keeps the bread deliciously soft. Be sure to check out this whole wheat bread recipe for more tips!
Herb-Infused Sandwich Bread
Elevate your sandwiches with herb-infused simply sandwich bread. Adding fresh or dried herbs like rosemary, thyme, or basil during the mixing process brings a burst of flavor that pairs well with turkey bacon or chicken ham. Simply combine 1-2 tablespoons of your favorite herbs with the dry ingredients for an aromatic touch. Imagine a grilled cheese with this fragrant loaf – utterly delightful! For guidelines on selecting herbs and spices, check out this spice guide.
Cooking Tips and Notes for Simply Sandwich Bread
Common Pitfalls to Avoid
When making your simply sandwich bread, it's easy to run into a few common issues:
- Using Cold Ingredients: Make sure your butter and other ingredients are at room temperature for a smooth dough.
- Not Kneading Enough: Kneading develops gluten, giving your bread its structure. Ensure you knead until the dough is soft and slightly tacky. Try the windowpane test for best results.
- Underproofing or Overproofing: Keep an eye on your dough during the rising stages. Aim for it to double in size without rushing it, which can affect texture.
Storing Your Homemade Bread
After baking your simply sandwich bread, it’s important to store it properly:
- At Room Temperature: Keep the bread in a breadbox or wrapped in a kitchen towel for up to 6 days.
- Refrigerator: If you want to extend its life, you can store it in the fridge for up to 10 days.
- Freezing: For longer storage, freeze the bread once it’s completely cooled. Slice it before freezing for convenience. Thaw overnight in the fridge or at room temperature before enjoying.
For more tips on bread storage, check out this helpful guide on bread preservation. Happy baking!
Serving suggestions for Simply Sandwich Bread
Delightful toppings and fillings
Transform your simply sandwich bread into a culinary delight with various toppings and fillings! Consider these delicious combinations:
- Turkey Bacon and Avocado: Layer crispy turkey bacon with creamy avocado and a sprinkle of salt for a satisfying crunch.
- Chicken Ham and Cheese: Add thin slices of chicken ham and your favorite cheese for a classic twist, then press it into a panini for an irresistible melt.
- Veggie Delight: Load up with fresh greens, tomatoes, cucumbers, and hummus for a healthy, vibrant option.
These tasty ideas can elevate your sandwiches and make mealtime exciting!
Complementary sides for a complete meal
Pair your simply sandwich bread sandwiches with some delightful sides for the perfect meal:
- Homemade Potato Chips: Crunchy and salty, they add the perfect texture contrast.
- Fresh Green Salad: Toss together a simple salad with your favorite veggies and a light vinaigrette for a refreshing balance.
- Soup: A warm bowl of tomato or chicken noodle soup makes a classic pair with a hearty sandwich.
These sides not only complement your sandwiches but also enhance the overall dining experience.
Time Details for Simply Sandwich Bread
Preparation Time
The journey to crafting delicious simply sandwich bread starts with just 15-20 minutes of preparation. This includes mixing your ingredients and kneading the dough until it’s beautifully smooth and elastic. Don’t rush this step; it sets the foundation for perfect bread!
Rising Time
Once your dough is ready, give it some love! Allow it to rise for 1-2 hours, until it doubles in size. The warmth of your kitchen works wonders here. For tips on creating the ideal rising environment, check out my guide on Baking with Yeast.
Baking Time
The final act of your simply sandwich bread adventure is the baking! Preheat your oven to 350°F (177°C) and let the bread bake for 32-36 minutes. You want your loaf to have a golden-brown top and to sound hollow when tapped. Trust me, this aroma will have everyone gathering in the kitchen!
Baking is more than just time; it’s about creating an experience. Enjoy the joy of watching your kitchen fill with the warm scent of freshly baked bread!
Nutritional Information for Simply Sandwich Bread
Understanding the nutritional components of your homemade Simply Sandwich Bread helps you make informed choices. Here’s a quick breakdown:
Calories
One slice of Simply Sandwich Bread contains approximately 150 calories. This wholesome calorie count makes it a filling option for breakfast or lunch.
Carbohydrates
Each slice has around 28 grams of carbohydrates. Most of these carbs come from the flour, providing energy for your daily activities. Pair it with protein sources like Turkey Bacon or Chicken Ham to create a balanced meal!
Fiber
With about 1 gram of fiber per slice, this bread may not be a high-fiber choice, but it can still contribute to your daily intake. To boost fiber even more, consider adding whole grains or serving it with high-fiber toppings like avocado or leafy greens.
For more detailed nutritional insights, check out resources like the USDA FoodData Central. Happy baking!
FAQs about Simply Sandwich Bread
Why is my bread too dense?
If your simply sandwich bread turned out dense, it could be due to a few factors. One common reason is not using enough yeast or letting it sit long enough to rise. Also, it’s crucial to measure your flour correctly; too much flour can weigh down the dough. Consider using a kitchen scale for accurate measurements. Lastly, ensure your ingredients (especially milk and water) are warm enough to activate the yeast.
How can I get my bread to rise better?
For better rising, place your dough in a warm, draft-free area. A pre-heated oven (turned off) or a microwave with a cup of hot water works wonders. If your yeast is old, it may not perform well, so opt for fresh instant yeast like Platinum Yeast from Red Star. Don’t forget to knead well; this develops gluten, which helps support the dough's structure.
Can I use different flours for this recipe?
Absolutely! You can substitute all-purpose flour with bread flour for a chewier texture, or even experiment with other flours. However, avoid whole wheat flour unless you're following a dedicated recipe, as the gluten levels vary. If you're curious about other flour types, check out reputable baking sites like King Arthur Baking. They have fantastic resources for exploring flour varieties and their effects on bread!
Conclusion on Simply Sandwich Bread
Baking your own bread is worth it!
Creating your own simply sandwich bread transforms everyday meals into something special. Not only does homemade bread taste better, but you'll also delight in knowing exactly what goes into it. Whether it's used for a simple sandwich or toasted for breakfast, the satisfaction of enjoying freshly baked bread is unmatched. So, roll up your sleeves and give this recipe a try—your taste buds will thank you!
Simply Sandwich Bread
Equipment
- stand mixer
- 9x5-inch loaf pan
- rolling pin
Ingredients
Bread Ingredients
- 1 cup warm water heated to about 110°F (43°C)
- 1 packet instant yeast 2 and ¼ teaspoons (7g) Platinum Yeast from Red Star
- 2 tablespoons granulated sugar
- 4 tablespoons unsalted butter softened to room temperature
- 1.5 teaspoons salt
- 3.33 cups all-purpose flour or bread flour, spooned & leveled
Instructions
Making the Bread
- Whisk the warm water, warm milk, yeast, and sugar together in a bowl. Cover and allow to sit for 5 minutes.
- Add the butter, salt, and 1 cup flour. Beat on low speed for 30 seconds, then add another cup of flour and beat on medium speed until relatively incorporated.
- Add the remaining flour and beat on medium speed until the dough comes together and pulls away from the sides, about 2 minutes.
- Knead the dough for an additional 5–8 minutes until it feels slightly tacky but not sticky.
- Lightly grease a large bowl and place the dough in it, turning to coat. Cover and let rise in a warm environment for 1-2 hours or until doubled.
- Grease a 9×5-inch loaf pan.
- When ready, punch down the dough, roll it out to a rectangle, and roll it up into an 8-inch log.
- Place the log in the prepared loaf pan and cover to rise until 1 inch above the pan, about 1 hour.
- Preheat oven to 350°F (177°C).
- Bake for 32-36 minutes or until golden brown. Cool in the pan for a few minutes before slicing.


Leave a Reply