
Introduction to Cheese Danish
If you’re a young professional constantly on the go, a Cheese Danish is the ideal breakfast or brunch pastry to brighten your busy mornings. Not only is this delightful treat incredibly easy to whip up, but it’s also a budget-friendly option that doesn’t compromise on taste. You can have a tantalizing, warm Cheese Danish fresh from the oven in just about 25 minutes. Talk about convenient!
But what makes the Cheese Danish a perfect choice for busy lifestyles? This flaky pastry is made with puff pastry—a store-bought hero that saves you time without sacrificing quality. Just imagine biting into that buttery crust, filled with a creamy, sweet cheese mixture that makes any ordinary morning feel like a special occasion.
Additionally, the total cost of making this Cheese Danish is approximately $6.07, which breaks down to just $1.01 per serving. That’s not only kind to your wallet but also far more affordable than any café option. You could even customize your Danish with a drizzle of your favorite jam, adding a personal touch to your snack.
Ready to impress yourself and those you care about? Let’s get cooking!

Ingredients for Cheese Danish
Creating a delicious cheese Danish starts with gathering a handful of essential ingredients that come together beautifully. Here’s what you’ll need:
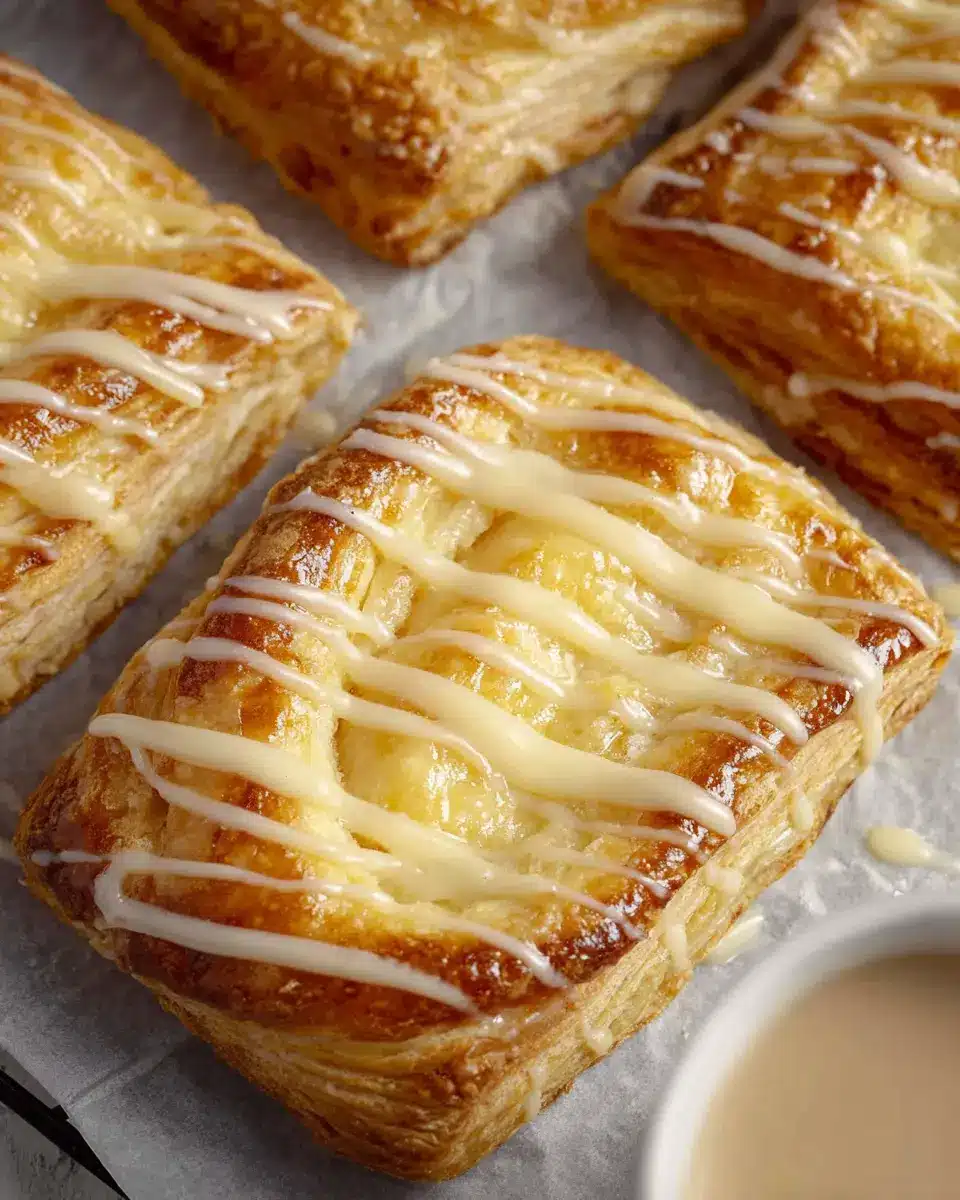
Essential ingredients for a delicious Cheese Danish
- 8 oz. cream cheese, softened: This is the star of your filling, providing that rich, creamy texture.
- ⅓ cup powdered sugar: Sweetens the filling to perfection.
- 1 teaspoon vanilla extract: A touch of vanilla enhances the flavors and adds warmth.
- 1 pinch of salt: Balances the sweetness and brings out the flavors.
- 1 sheet of puff pastry, thawed: The flaky base that holds all the deliciousness together.
- 1 egg yolk and white, separated: The yolk gives richness to the filling, while the white helps achieve a golden-brown finish.
Optional ingredients to enhance flavor
For those looking to elevate their cheese Danish, consider these optional additions:
- Zest of lemon or orange: Adds a refreshing citrus twist to the filling.
- Extra vanilla extract (¼ teaspoon in icing): Intensifies the flavor of the icing.
- 1 tablespoon melted butter: Mix into your icing for a luxurious finish.
- Strawberry jam: Drizzle over your cooled cheese Danish for a fruity touch.
With these ingredients, you're well on your way to baking a delightful treat that’s sure to impress. Happy baking!
Step-by-step Preparation of Cheese Danish
Making a cheese danish is delightfully simple, and the process allows for a bit of creative flair. Whether you’re preparing for a brunch with friends or indulging yourself at breakfast, this step-by-step guide will have your kitchen feeling warm and inviting in no time!
Gather your equipment and ingredients
Before you dive into the preparation, make sure you have everything ready to go. Here’s what you’ll need:
Equipment:
- Hand mixer
- Mixing bowls
- Wire cooling racks
- Baking sheet
Ingredients:
- 8 oz. cream cheese (softened)
- ⅓ cup powdered sugar
- 1 teaspoon vanilla extract
- 1 pinch of salt
- 1 sheet of thawed puff pastry
- 1 egg yolk and white (separated)
For the icing:
- ½ cup powdered sugar
- ¼ teaspoon vanilla extract
- 2 tablespoon milk
Tip: Thaw the puff pastry in the fridge to prevent cracking. For a nifty trick, consider adding a teaspoon of lemon or orange zest to the filling for an extra zing!
Prepare the cream cheese filling
In a mixing bowl, combine the softened cream cheese with the powdered sugar, vanilla extract, and a pinch of salt. Use a hand mixer to whip the ingredients together until the mixture is smooth and light—this will be the star of your cheese danish. The process should only take a few minutes, and remember, tasting a spoonful is totally acceptable (in fact, encouraged!).
Prepare the puff pastry
Unfold your sheet of thawed puff pastry onto a floured surface. This is where the magic happens! Dust off any excess flour and gently cut the pastry along the seams to create three equal strips. Each strip can then be cut in half to form six equal rectangles.
For that beautifully risen edge, use a fork to perforate around the sides of each rectangle, leaving a half-inch border. This will create a lovely edge while keeping the filling in the center.
Assemble the Cheese Danish
Now for the fun part! Spoon two heaping tablespoons of your cream cheese mixture onto each pastry square. Make sure you spread it evenly, but don’t go over the edges—those golden borders are crucial!
Next, take the egg white and beat it until frothy. With a pastry brush, lightly coat the borders of the cheese danish rectangles. This will provide a gorgeous glossy finish once baked.
Bake the Cheese Danish
Preheat your oven to 400°F, and line a baking sheet with parchment paper. Place the assembled pastries onto the sheet and pop them in the oven. Bake for about 10 minutes, then rotate the baking sheet for even cooking. Continue baking until the pastries are golden and puffed—this usually takes another 5 to 10 minutes.
Once done, let them cool on a wire rack. For the icing, mix powdered sugar, vanilla extract, and milk together until smooth, and drizzle it over your cooled cheese danish.
Enjoy the delightful aroma that fills your kitchen as you share these sweet treats with family or friends. They’ll never guess just how simple they were to make!
And if you’re feeling indulgent, consider drizzling some thinned strawberry jam over the top for a twist. Happy baking!
Variations on Cheese Danish
Fruit-topped Cheese Danish
Elevate your cheese Danish with a burst of fresh fruit! Consider topping your pastries with seasonal berries like blueberries, raspberries, or strawberries for a vibrant contrast. You can also try adding a spoonful of peach or apricot preserves before the cream cheese filling for a sweet twist. Not only do these additions provide a lovely aesthetic, but they also add a refreshing flavor that balances the richness of the cream cheese. If you're feeling adventurous, a drizzle of honey or maple syrup can enhance the sweetness further.
Savory Cheese Danish Varieties
Why stick to sweet? Savory cheese Danish variations are equally delicious! Incorporate fillings like sautéed spinach, feta, and turkey bacon for a delightful brunch option. Alternatively, try a combination of chicken ham and sharp cheddar for a flavorful spin. The beauty of a cheese Danish is its versatility—think of it as a canvas, ready for your culinary creativity. For recipes inspiration, you might want to check out Bon Appétit or Food Network for creative ideas. The possibilities are truly endless!
Cooking Tips and Notes for Cheese Danish
Thawing Puff Pastry Properly
To achieve that perfect flaky texture in your Cheese Danish, it's essential to thaw the puff pastry properly. Always thaw it in the fridge for 1-2 hours rather than at room temperature. This prevents the butter layers from melting, which is crucial for getting that delicious, airy rise. If you’re short on time, placing it in the fridge while you prep the filling can work wonders.
Timing Tips to Ensure Perfect Baking
Timing is key when baking your Cheese Danish. Start with a preheated oven at 400°F and bake for 10 minutes before rotating the baking sheet. This helps ensure even browning. Keep an eye on them during the last few minutes to catch that perfect golden-brown finish—every oven behaves differently! You want the edges to be nicely puffed and crisp, inviting your loved ones to dig in.

Serving Suggestions for Cheese Danish
Ideal Pairings for Breakfast or Brunch
Looking to create the perfect brunch atmosphere? Pair your delicious Cheese Danish with refreshing beverages like freshly squeezed orange juice or creamy coffee. For a more savory touch, consider side options like scrambled eggs, turkey bacon, or chicken ham. They bring a delightful balance to the sweetness of the danish. Don't forget to add some fresh fruit, like strawberries or melons, for a vibrant and healthy addition to your plate!
Perfect Desserts to Accompany Cheese Danish
If you're serving Cheese Danish as a dessert, how about complementing it with a scoop of vanilla ice cream or a dollop of whipped cream? You might also try fresh berries, which add a burst of flavor that pairs well with the rich creaminess of the pastry. Another fun idea is to serve a simple chocolate sauce on the side for drizzling—a touch of indulgence that guests will love! For more on dessert pairings, check out The Kitchn.
Time Breakdown for Cheese Danish
Preparation Time
Getting your Cheese Danish ready takes just 10 minutes. This quick prep involves mixing your cream cheese filling and preparing the puff pastry, making it perfect for a busy morning or spontaneous brunch.
Cooking Time
Once prepped, pop those beauties in the oven for about 15 minutes. You’ll want to keep an eye on them as they turn golden and delicious!
Total Time
In just 25 minutes, you can have warm, flaky Cheese Danish on your table, ready to impress friends and family. Isn’t that a delightful way to elevate your breakfast or brunch?
Nutritional Facts for Cheese Danish
Calories and Serving Information
Each Cheese Danish boasts around 438 calories per serving, making it a delightful indulgence for breakfast or brunch. If you're hosting a gathering, this easy recipe yields six scrumptious danishes, perfect for sharing with friends and family.
Macronutrient Breakdown
When it comes to macronutrients, each serving of this delicious pastry contains:
- Carbohydrates: 38g
- Protein: 6g
- Fat: 29g
- Sodium: 240mg
- Fiber: 1g
It's a sweet treat that strikes a balance between indulgence and satisfaction. For more information on nutrition, consult sources like the USDA's FoodData Central or Harvard Health.
FAQs on Cheese Danish
What can I substitute for cream cheese?
If you’re looking for alternatives to cream cheese in your Cheese Danish, consider using ricotta cheese or mascarpone. Both options provide a similar creamy texture, though they may impart a slightly different flavor. For a lower-calorie choice, you could even try a blend of Greek yogurt with a bit of powdered sugar for sweetness.
How do I store leftover Cheese Danish?
To keep your leftovers fresh, store your Cheese Danish in an airtight container at room temperature for up to two days. For longer storage, wrap them tightly in plastic wrap or aluminum foil to prevent drying out, and place them in the refrigerator. When you're ready to enjoy them again, just warm them up in the oven for a few minutes!
Can I freeze Cheese Danish?
Absolutely! Freezing your Cheese Danish is a great way to extend their life. Once cooled, wrap each Danish in plastic wrap, and then place them in a freezer-safe bag. They can be stored for up to three months. To reheat, simply pop them in the oven at 350°F until warmed through.
Conclusion on Cheese Danish
Making a Cheese Danish at home is a delightful experience that anyone can master! With just a few simple ingredients and our easy-to-follow recipe, you’ll impress your friends or family in no time. Give it a go and enjoy the delicious results—each bite is worth the effort!

Cheese Danish
Equipment
- hand mixer
- Mixing Bowls
- Wire Cooling Racks
- baking sheet
Ingredients
Cheese Danish
- 8 oz cream cheese softened
- ⅓ cup powdered sugar
- 1 teaspoon vanilla extract
- 1 pinch salt
- 1 sheet puff pastry thawed
- 1 egg yolk and white separated
Icing
- ½ cup powdered sugar
- ¼ teaspoon vanilla extract
- 2 tablespoon milk
Instructions
Cheese Danish Instructions
- Line a baking sheet with parchment paper. Place your oven's rack in the center and preheat it to 400°F. Mix the cream cheese, powdered sugar, vanilla, egg yolk, and salt until smooth and light in texture.
- Unfold the sheet of puff pastry, dust off excess flour, and place it on the baking sheet. Cut down the seams of the folds so you have three equal-sized strips. Cut the strips into halves.
- Use a fork to perforate around the sides of each puff pastry rectangle, leaving a half-inch border. This prevents the puff pastry from rising in the middle.
- Add 2 heaping tablespoons of your cream cheese mixture to each square. Spread evenly, making sure to leave the borders clean.
- Beat the egg white until frothy. Dip a pastry brush into the beaten egg white and trace lightly along the borders. This will give the puff pastry a glossy finish and golden color.
- Bake at 400°F for 10 minutes then rotate the baking sheet, front to back. Continue to bake for 5 to 10 minutes, or until the borders of the puff pastry have risen and are golden brown. Use a spatula to remove the pastries from the sheet pan and cool on a rack.
- In a separate bowl, mix the powdered sugar, vanilla, and milk. Cool the Cheese Danish before adding the icing so it doesn't melt into the pastry.
- Finally, drizzle over cooled Cheese Danish and watch your loved ones gobble them down!


Leave a Reply