
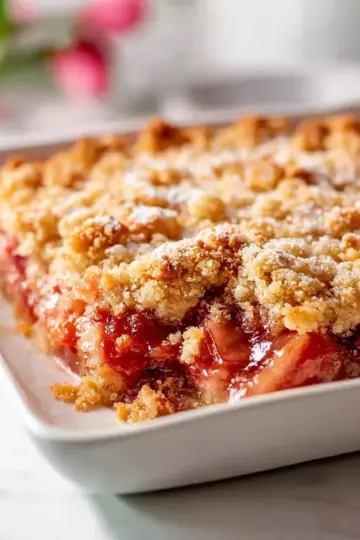
Introduction to Cherry Slab Pie
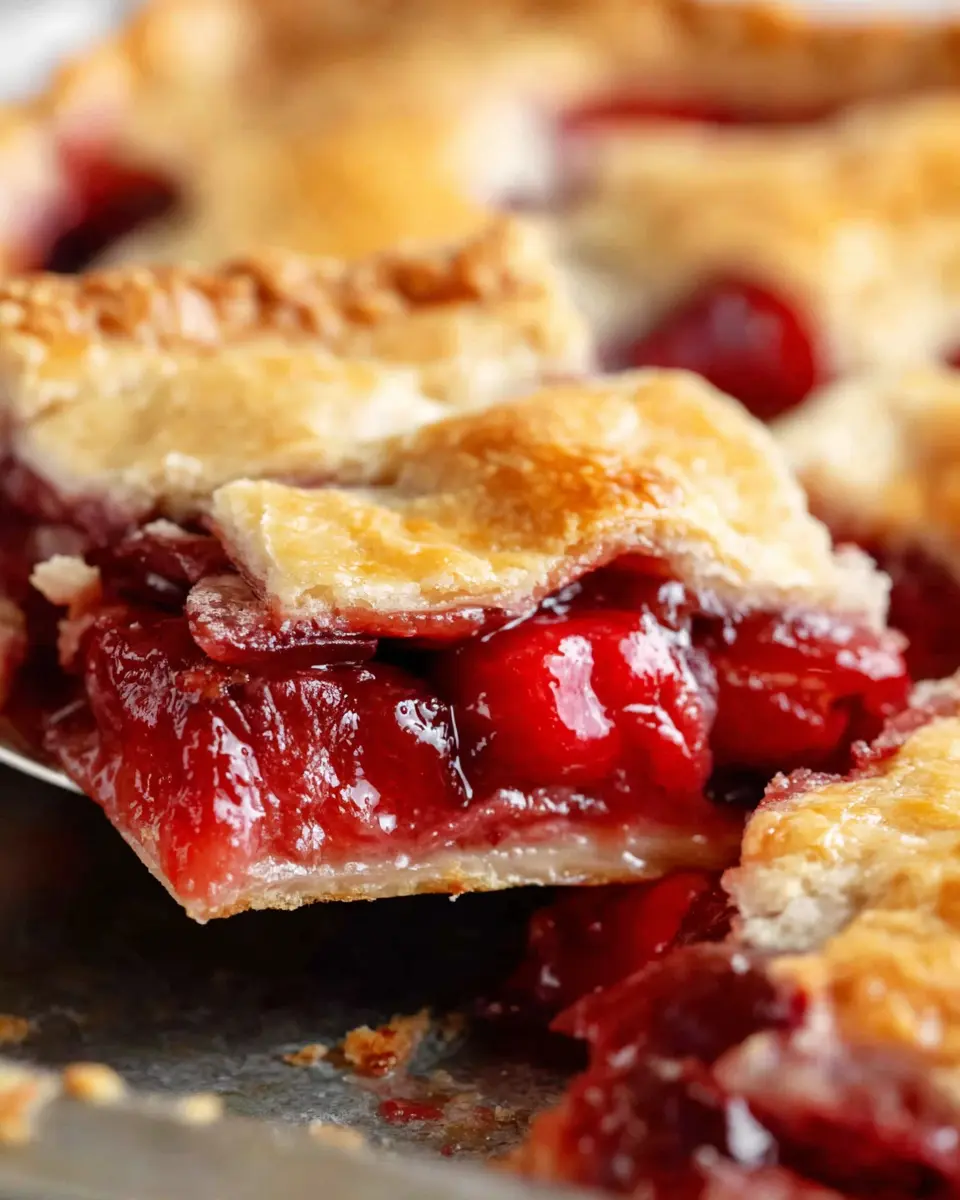
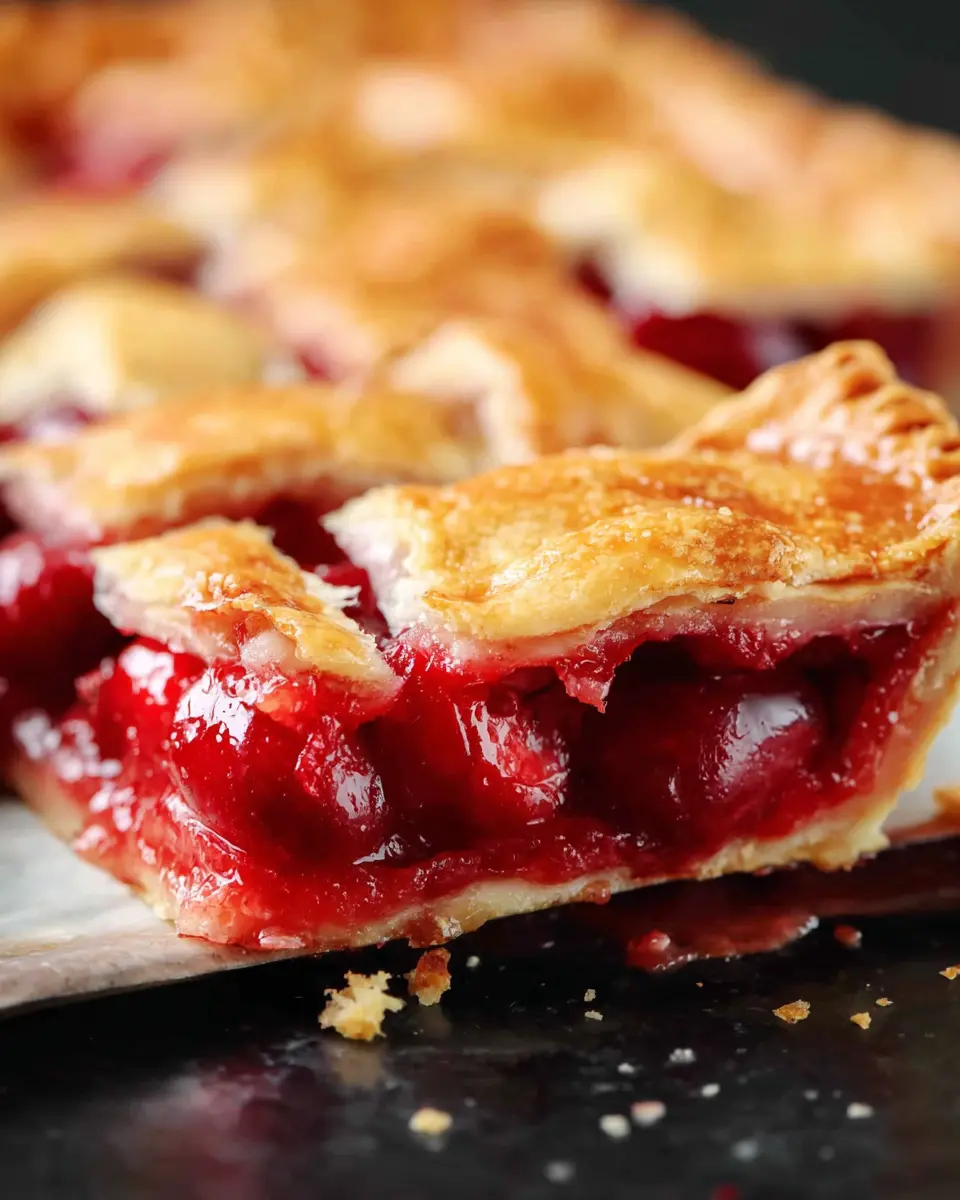
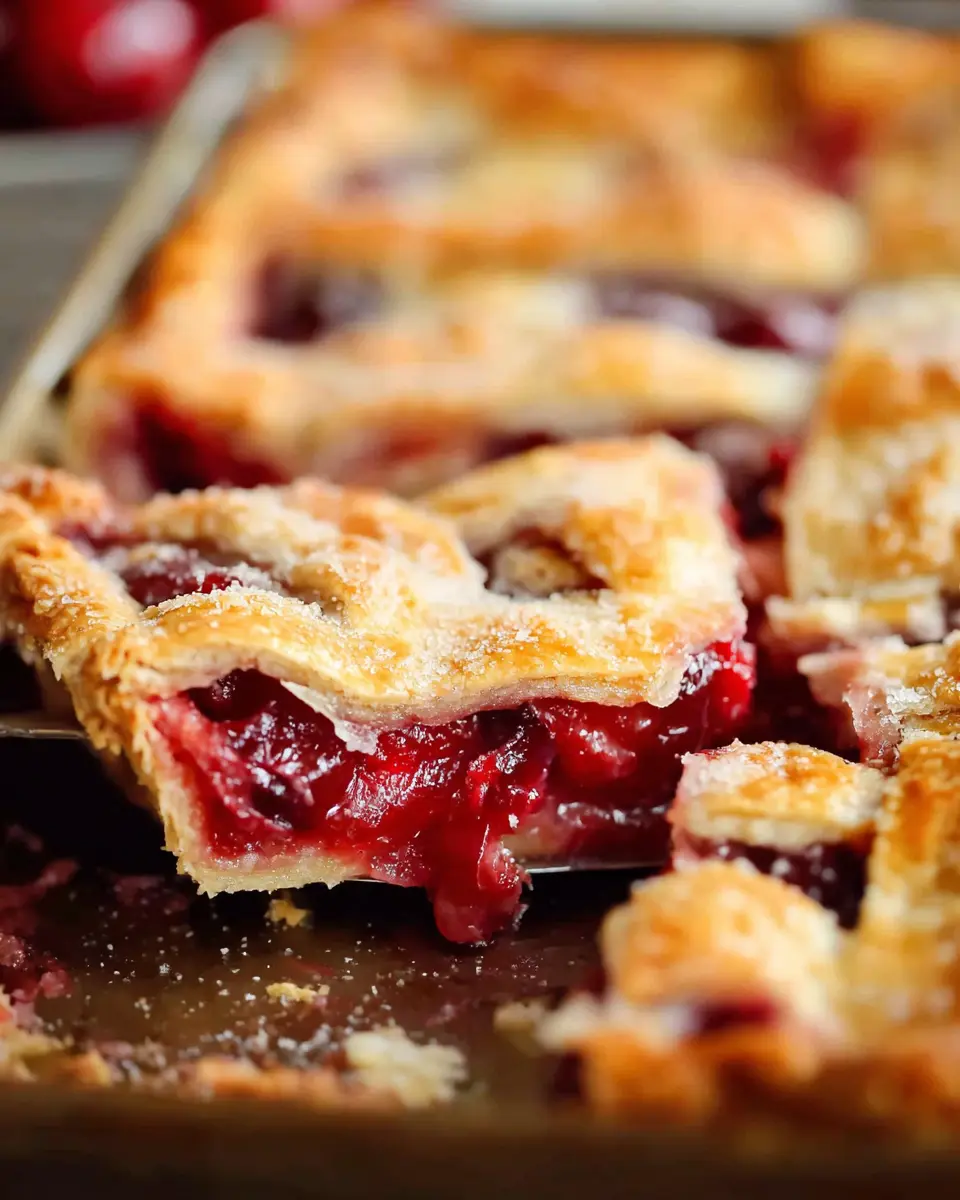
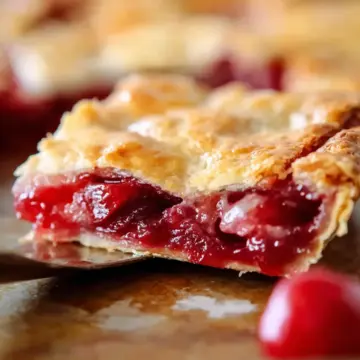
When it comes to satisfying your sweet tooth, Cherry Slab Pie offers a delightful twist on the classic cherry pie you know and love. Traditionally baked in a pie dish, cherry pie can sometimes limit how many slices you can serve. In contrast, the slab pie is baked in a sheet pan, allowing you to cut generous squares and serve anywhere from 18 to 24 slices. This makes it a fantastic option for gatherings, parties, or just a cozy night in with friends.
Imagine the joy of sharing a delicious dessert that doesn't require endless slicing or worrying about leftovers. Plus, gooey cherry filling and flaky crust come together in a way that lets everyone enjoy a piece without feeling guilty about taking “too much.”
One of the best parts about making a Cherry Slab Pie is how approachable it is, even for beginner bakers. With just a few simple ingredients and some basic baking techniques, you'll create a scrumptious treat that impresses everyone around the table. Whether you pair it with a scoop of vanilla ice cream or enjoy it as is, your taste buds are in for a treat.
Thinking about baking one yourself? You'll find all the details in the full recipe below!
For more pie inspiration, visit King Arthur Baking and explore their delicious collection of recipes.
Ingredients for Cherry Slab Pie
Creating a delicious Cherry Slab Pie is all about using the right ingredients to bring out the rich flavors of the cherries and the flaky crust. Here’s what you'll need to whip up this delightful dessert:
Pie Crust
- 4 cups all-purpose flour
- 2 teaspoons salt
- 1 ¼ cups shortening
- ½ cup cold butter, cut into small cubes
- 1 tablespoon vegetable oil
- ¾ cup milk
- 1 tablespoon lemon juice
Cherry Filling
- 3 (21 oz.) cans cherry pie filling – this ensures a juicy and flavorful filling!
Crust Dust
- 2 tablespoons all-purpose flour
- 2 tablespoons sugar
Egg Wash
- 1 egg, beaten
- 1 tablespoon water to help achieve that golden finish
Gathering these ingredients is the first step toward serving a sweet treat that everyone will enjoy. Don't forget to read through the full recipe for a step-by-step guide on how to combine these to create your Cherry Slab Pie. If you're interested in more baking tips, check out resources from the American Pie Council. Happy baking!
Step-by-Step Preparation of Cherry Slab Pie
Creating a delicious Cherry Slab Pie is a delightful way to indulge in sweet, tart flavors while making enough to share with friends and family. Follow these simple steps for an unforgettable dessert that’s perfect for any gathering!
Gather and Prepare Ingredients
Before you dive into baking, it’s essential to gather all your ingredients. This not only streamlines the process but also makes it more enjoyable! Here’s what you’ll need:
- For the Pie Crust: 4 cups all-purpose flour, 2 teaspoons salt, 1 ¼ cup shortening, ½ cup cold butter (cut into cubes), 1 tablespoon vegetable oil, ¾ cup milk, and 1 tablespoon lemon juice.
- For the Cherry Filling: 3 cans (21 oz. each) of cherry pie filling.
- For the Crust Dust: 2 tablespoons all-purpose flour and 2 tablespoons sugar.
- For the Egg Wash: 1 egg (beaten) mixed with 1 tablespoon water.
Once you have everything ready, you'll be on your way to creating an amazing Cherry Slab Pie from scratch!
Make the Pie Crust from Scratch
Start by mixing the flour and salt in a large bowl. Cut in the shortening and butter until the mixture resembles small peas. In a separate bowl, combine the milk and lemon juice, then add the vegetable oil. Incorporate this mixture into the flour until a soft dough forms (don’t hesitate to use your hands). Divide the dough into two discs, wrap them in plastic, and refrigerate for about 30 minutes. This step is crucial for achieving a flaky crust!
Prepare the Cherry Filling
While the dough chills, open your cans of cherry pie filling. You can also consider making your own filling with fresh cherries for an extra special touch—it's surprisingly easy! Just cook fresh cherries with some sugar and cornstarch until thickened.
Assemble the Slab Pie
Preheat your oven to 400 degrees Fahrenheit. Roll out one portion of dough on a floured surface until it forms a 13x18-inch rectangle. Place this into a 10x15-inch jelly roll pan, letting the excess hang over the edges. Sprinkle your crust dust (2 tablespoons flour and 2 tablespoons sugar) on the bottom before pouring in the cherry filling. Roll out the second dough disc in the same manner, cover the filling, and fold the overhanging edges back, tucking them in. Don’t forget to pinch the edges and cut slits in the top to let steam escape!
Bake and Cool the Pie
Brush the top crust with your egg wash and sprinkle with sugar for a beautiful finish. Bake the pie for 30 minutes, then loosely cover with foil and continue baking for an additional 20-25 minutes, or until golden brown and bubbling. This step truly brings out that delightful cherry flavor! Allow the pie to cool for at least 2 hours before slicing—patience is key here.
By following these steps, you'll have created a stunning Cherry Slab Pie that’s sure to impress! For tips on presentation and serving, feel free to explore more resources on baking techniques that can enhance your dessert experience.
Variations on Cherry Slab Pie
Alternate Fruit Fillings
Why stop at cherries? You can play with various fruit fillings to give your slab pie a fresh twist! Consider using blueberries, peaches, or even a mixed berry blend for bright flavors. A great option is apricots, which provide a tangy zest. If you want something unique, try a savory option with plums or even a combination of raspberries and blackberries for an exciting tartness. The versatility of the slab pie makes experimenting with fillings easy and fun!
Additional Flavor Additions
Want to elevate your Cherry Slab Pie? Adding a touch of lemon zest or almond extract can enhance the fruit’s natural sweetness beautifully. For a spice kick, consider mixing in cinnamon or nutmeg for warmth. You might even think about folding in a handful of finely chopped nuts for a delightful crunch, or a smear of cream cheese beneath the fruit filling for added richness. These simple tweaks can transform your dessert from delightful to spectacular.
For more inspiration and recipes, check out this resource for seasonal fruit ideas!
Cooking Tips and Notes for Cherry Slab Pie
When making your Cherry Slab Pie, here are some handy tips to ensure success.
- Chilling the Dough: Don’t skip refrigerating your dough; this keeps it flaky and easy to handle.
- Fresh Cherries: If you’re feeling adventurous, consider using fresh cherries! Just pit and toss them with a bit of sugar and cornstarch before baking. More on that here.
- Testing for Doneness: Keep an eye on the crust. A golden top and bubbling filling are your signs to take it out!
- Serving Suggestions: Serve slices warm with a scoop of vanilla ice cream or a dollop of whipped cream for an extra treat.
With these tips, your Cherry Slab Pie will be a hit!
Serving Suggestions for Cherry Slab Pie
Cherry Slab Pie is a versatile dessert, perfect for gatherings or a cozy night in. Here are some delightful serving suggestions:
-
Warm and Whipped: Serve warm, topped with a dollop of fresh whipped cream or a scoop of vanilla ice cream for a classic indulgence.
-
Charming Pairings: Consider pairing it with tea or coffee to enhance the cherry flavors while providing a comforting experience.
-
A La Mode Twist: For a fun twist, serve with a side of chocolate or caramel sauce for drizzling.
-
Garnish Smartly: Fresh mint leaves or a sprinkle of powdered sugar can add a lovely touch, making your pie presentation even more inviting.
These serving tips can elevate your Cherry Slab Pie experience and impress your guests! Want more ideas? Check out this resource for pie-serving inspiration.
Time Breakdown for Cherry Slab Pie
Preparation Time
Getting your Cherry Slab Pie dough ready will take approximately 45 minutes. This includes mixing your ingredients, chilling the dough, and rolling it out. Remember to have everything at room temperature for easier handling!
Baking Time
The baking process is essential for the perfect crust and bubbling filling. Expect around 55 minutes in total: 30 minutes uncovered, followed by 20 to 25 minutes covered with foil to ensure even cooking.
Cooling Time
Patience is key! Let your Cherry Slab Pie cool for at least 2 hours. This allows the filling to set, making for easier slicing and, ultimately, better presentation. Trust us, the wait will be worth it!
For more cooking tips, check out America's Test Kitchen for techniques that can elevate your baking game.
Nutritional Facts for Cherry Slab Pie
When indulging in a slice of Cherry Slab Pie, it's helpful to know the nutritional breakdown. Here’s what you can expect:
Calories per slice
Each slice clocks in at approximately 226 calories. Perfect for a sweet treat without going overboard!
Carbohydrates
This delightful pie contains around 19 grams of carbohydrates per slice, making it a satisfying option after your meal.
Sugar content
Worried about the sweet stuff? You’ll find about 2 grams of sugar per slice, which is relatively low for a dessert. Enjoy the burst of flavor without the guilt!
For more details on healthier dessert choices, check out Healthline's guide on desserts.
FAQs about Cherry Slab Pie
How can I store leftover slab pie?
To keep your leftover cherry slab pie fresh, simply leave it in the pan and cover it tightly with plastic wrap. It should stay delicious for up to three days in your fridge. If you're worried about it drying out, make sure the wrap is secure!
Can I freeze cherry slab pie?
Absolutely! Freezing your cherry slab pie is a great option if you want to save some for later. Wrap it tightly in plastic wrap or aluminum foil, then place it in an airtight container or freezer bag. It can last for up to three months in the freezer. Just thaw it in the fridge overnight before serving.
What should I serve with cherry slab pie?
You can elevate your cherry slab pie experience by serving it with a scoop of vanilla ice cream or a dollop of freshly whipped cream. For a fancy twist, consider pairing it with a side of tart yogurt or a drizzle of caramel sauce. The options are endless!
Conclusion on Cherry Slab Pie
In summary, the Cherry Slab Pie is a delightful twist on a classic favorite, perfect for gatherings or family events. With its generous servings and vibrant filling, this dessert can brighten up any table. Share it with loved ones and watch as it disappears in no time!
Cherry Slab Pie
Equipment
- Large bowl
- Small bowl
- jelly roll pan
- pizza stone
- plastic wrap
- rolling pin
Ingredients
PIE CRUST
- 4 cups all-purpose flour
- 2 teaspoons salt
- 1.25 cups shortening
- 0.5 cups COLD butter cut into small cubes
- 1 Tbsp. vegetable oil
- 0.75 cups milk
- 1 Tbsp. lemon juice
CHERRY FILLING
- 3 cans cherry pie filling 21 oz. each
CRUST DUST
- 2 Tbsp. all-purpose flour
- 2 Tbsp. sugar
EGG WASH
- 1 egg beaten
- 1 Tbsp. water
Instructions
Instructions
- Mix flour and salt in a large bowl. Cut in shortening and butter until the particles are the size of small peas.
- Combine milk and lemon juice together in a small bowl.
- Add oil and milk/lemon mixture to the flour mixture and stir until a soft dough forms. You may need to use your hands to form the mixture into a dough.
- Divide the dough into two equal portions. Flatten into a disc and wrap with plastic. Refrigerate 30 minutes.
- Preheat the oven to 400 degrees. If you have a pizza stone, place it on the oven rack to preheat.
- Roll pie crust on a lightly floured surface. Keep rolling until it is a 13x18" rustic-looking rectangle (about ⅛" thick).
- Place the rectangle into a 10x15" jelly roll pan, allowing the excess to hang over the edge of the pan.
- Sprinkle crust dust (a combination of 2 Tbsp. sugar and 2 Tbsp. flour) over the pie crust bottom.
- Pour cherry filling over the bottom crust.
- Roll the second crust out into a rustic-looking 13x18" rectangle.
- Place on top of the pie.
- Fold the edges of the top and bottom crust back and tuck into the pan.
- Use your fingers to pinch and crimp the edges of the pie (or use a fork to crimp).
- Cut slits into the top of the pie to allow steam to vent while baking.
- Brush the crust lightly with egg wash then sprinkle with sugar.
- Bake slab pie for 30 minutes.
- Cover/tent loosely with foil and bake for an additional 20-25 minutes.
- The top should be GOLDEN and the filling should be bubbling.
- Allow the pie to cool for at least 2 hours before slicing.


Leave a Reply